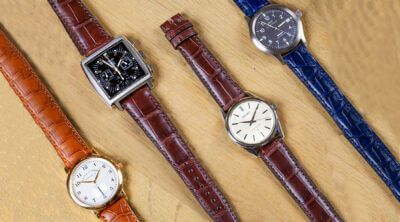
Why Change Your Watch Strap at Home?
Changing a watch strap at home is simpler than many people think, and you can often do it without a dedicated tool. Whether your leather strap is worn out, you want to freshen up the look, or simply prefer a different style for the season, learning how to change a watch band at home is a practical skill that saves time and money.
Before you start, it helps to understand two key parts of your watch. Spring bars are small spring-loaded pins that hold many straps in place, sitting horizontally inside the lugs (the “arms” of the watch case where the strap attaches). When you remove or install a strap, you are working with these components. The good news: you do not need expensive equipment to do this safely.
Here are the main reasons people change their straps at home:
- Refresh the look of your watch without buying a new one
- Personalize your watch to match your style or outfit
- Switch between formal leather and casual nylon or rubber for different occasions
- Learn a simple, rewarding hands-on skill
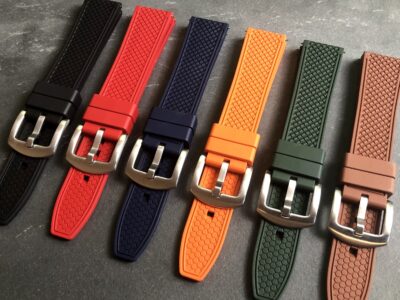
This guide covers three common strap types and multiple tool-free methods to remove and reinstall them safely. You will learn how to work with traditional spring bar straps using dental floss, credit cards, or small screwdrivers, as well as how to handle quick release straps (which have a built-in lever or button) and single-piece pass-through straps like NATO, Zulu, and Perlon styles.
One important note: while the methods in this guide are designed to minimize risk, it is not possible to guarantee zero scratches, especially if your watch has tight lugs or you are new to the process. The techniques that follow focus on protecting your watch and strap as much as possible. If at any point you feel uncertain or notice damage starting, you can stop and seek professional help.
Next, in “Check Your Strap Type First (No Tool Needed?)”, you will confirm what kind of strap you have so you can choose the right method.
Check Your Strap Type First (No Tool Needed?)
Before you attempt to change your watch strap, you need to identify what type of strap you have. Not all straps require the same removal method, and some are genuinely tool-free. Spending two minutes on this identification step will save you frustration and prevent you from using the wrong technique for your strap. The good news is that you can determine your strap type just by looking at it and feeling it.
Quick Strap Type Identification
Look at the underside of your watch where the strap connects to the watch case. You are checking for three key things: a small lever or button, a single continuous piece of material, or the presence of small metal pins.
Quick release straps have a small lever or button on the underside of the strap, near where it attaches to the watch case. If you see this lever or button, your strap is designed to release with a simple pull or press of that control—no tools or additional methods needed. Press or pull that lever gently to release the strap. This is the easiest removal method and carries almost no risk of damage.
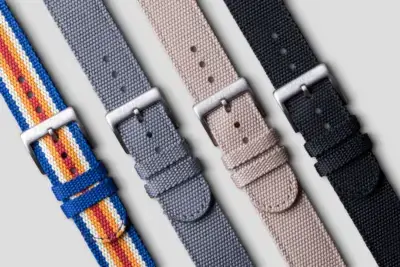
NATO straps, Zulu straps, and Perlon straps are single-piece pass-through straps. Instead of being held by metal spring bars, these straps simply thread through the watch lugs (the arms of the watch case where the strap connects). You can remove a NATO strap by sliding it directly out through the lugs without removing any hardware. No tool and no special method required beyond a gentle pull.
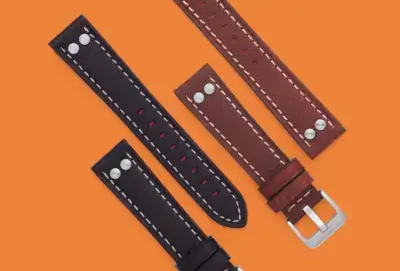
Traditional spring bar straps are most leather, rubber, nylon, and fabric straps. These straps are held in place by small spring-loaded pins called spring bars. The spring bar sits inside holes in the lugs and is held tight by an internal spring. To remove a traditional spring bar strap, you must compress the spring bar inward so it retracts and releases from the lug holes. This is where tool-free methods like dental floss, a credit card, or a small screwdriver come into play.
Drilled lugs are a feature on some watch cases. Look closely at the outside edges of the lugs (the arms that stick out from the watch case). If you see small holes on the outer face of these arms, your watch has drilled lugs. Drilled lugs give you an extra access point for a small flathead screwdriver or similar item, making spring bar removal easier and safer for beginners.
Mini-Glossary for Clarity
Spring bar: a small spring-loaded metal pin that holds many straps in place by sitting in holes on the lugs. Lugs: the arms of the watch case where the spring bar sits and the strap connects. Quick release straps: straps with a built-in lever or button that compress the spring bar without tools. Drilled lugs: small holes on the outside of the lugs that allow easier access to the spring bar with a small tool.
Decision Guide: What Strap Type Do You Have?
Use this simple flowchart to find the right method for your strap:
- Do you see a small lever or button on the underside of the strap near the spring bar? If yes, you have a quick release strap. Go to the Quick Release and Pass-Through Straps section and use the lever method.
- Is your strap one continuous piece of material that threads through the lugs (no metal hardware holding it)? If yes, you have a NATO, Zulu, or Perlon pass-through strap. Go to the Quick Release and Pass-Through Straps section and use the threading method.
- Do you see small metal pins on the inside of the strap where it connects to the lugs, and is the strap made of leather, rubber, nylon, or similar material? If yes, you have a traditional spring bar strap. Choose a tool-free removal method: start with the Dental Floss Method (safest), then try the Credit Card Method (if lugs are tight), or the Screwdriver Method (only if your lugs are drilled and other methods have not worked, or for stubborn bars that won’t compress after floss or card attempts).
Strap Types: Do You Need a Tool?
| Type | Tool Needed | Best For | Risks |
|---|---|---|---|
| Quick Release Strap | No | Fast, frequent strap changes; casual wear and sport watches | None; designed for tool-free use |
| NATO Strap (Zulu, Perlon) | No | Casual, everyday wear; simple one-strap swaps | Low; single piece means no small parts to lose |
| Traditional Spring Bar Strap | No (tool-free method) or optional | Durable, formal, or specialty leather and metal straps | Medium; spring bars must be compressed carefully to avoid strap or case scratching [No tool required; choose among Dental Floss, Credit Card, or Screwdriver methods below.] |
Once you have identified your strap type, you know whether you can proceed with a tool-free method or if you have one of the truly tool-free designs. Learn more about lug widths and how they affect strap fit so you choose the right replacement strap for your next change.
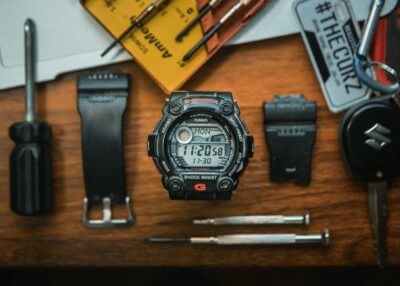
Prep Your Workspace Like a Pro
Before you attempt any method to change your watch strap at home, setting up the right workspace is essential. A proper setup prevents scratches, keeps small parts from getting lost, and gives you a clear view of the spring bars and lugs. Rushing through this step is one of the most common reasons beginners end up with unwanted marks on their watches.
The foundation of a safe workspace is protecting your watch from accidental damage. Your watch case and lens are vulnerable when the strap is removed and the watch is positioned for work. A soft cloth creates a cushion that absorbs impacts and prevents the watch from sliding or tipping over.
Here is what you need to prepare before starting:
- Soft cloth (microfiber, cotton, or similar) placed on a firm, flat surface
- Good lighting so you can see the spring bar shoulders and any holes clearly
- Firm surface such as a table or bench to prevent wobbling
- Unbuckle or unfasten the strap completely before you begin
- Steady hands and a calm pace; avoid rushing or applying sudden pressure
Once your workspace is ready, position your watch face down on the soft cloth. This orientation protects the watch case and lens from contact with tools or your hands. The back of the watch, where the spring bars connect to the lugs, will be facing up and fully visible. Keep all small parts, including the old spring bars if you plan to reuse them, contained on the cloth so nothing rolls away.
Common prep mistakes to avoid include working directly on a hard countertop without padding, which can scratch both the watch and the strap; using dim or angled lighting that makes it hard to locate the spring bar notches; and skipping the unbuckle step, which can tangle the strap during removal. For instance, working on a hard countertop without padding means the watch case could slide or tip if you apply sideways pressure, resulting in deep scratches. Similarly, dim lighting makes it easy to miss where the spring bar actually sits, and you may press on the case by mistake. Taking two minutes to prepare correctly saves you from frustration and potential damage later.
Dental Floss Method (Safest No-Tool Hack)
The safest and most beginner-friendly way to remove traditional spring bar straps without metal-to-metal scratching is the dental floss method. Floss creates a soft loop that catches the spring bar shoulder (the part that sticks out slightly) and compresses it gently as you pull, allowing the strap to slide free. This method works on any traditional spring bar strap and requires only a piece of dental floss you likely have at home.
How the Floss Method Works
Spring bars are under tension, pushing outward to keep your strap secure. A spring bar tool normally compresses this bar by pressing on its exposed end. Floss does the same job, but softly: when you loop it around the spring bar shoulder and pull in the right direction, the floss creates a gentle compression force that pushes the bar inward without scratching the strap or case. The key is positioning the loop so it grips the shoulder and pulling away from the lug (toward you).
Step-by-Step Floss Removal
- Cut a piece of dental floss roughly 12 inches long and fold it in half to create a loop, leaving the two ends loose.
- Position your watch face-down on the soft cloth. Locate one spring bar end where the strap meets the lug.
- Gently insert the floss loop between the watch lug and the strap, sliding it toward the spring bar until the loop sits behind the visible part of the spring bar.
- Take the two loose ends of the floss and thread them through the loop you created, pulling them taut. The loop should now encircle the spring bar shoulder like a lasso.
- Pull the floss ends gently toward you (away from the watch case). As you pull, the loop tightens around the spring bar shoulder, compressing the bar inward into the strap.
- While pulling the floss, simultaneously slide the strap out and away from the lug with your other hand. The spring bar will stay compressed as long as the floss tension holds.
- Once one end is free, repeat steps 2 through 6 on the other side of the watch to remove the strap completely.
- Inspect the spring bar to confirm both ends slide freely and show no visible damage.
Image prompt: Floss loop placement between lug and strap, showing the loop sitting behind the spring bar shoulder with two loose ends hanging free. Alt-text: Dental floss looped around the visible shoulder of a spring bar at the watch lug, ready to be pulled toward the viewer.
Concrete Example: Dental Floss Loop on Spring Bar
You position your floss loop and begin to pull. The loop grips the spring bar shoulder, and you feel gentle resistance as the bar starts to compress. Halfway through the pull, the floss slips slightly and touches the edge of the strap. Stop immediately, release tension, and reposition the loop higher on the spring bar shoulder. Reinsert the floss ends through the loop, ensure they are tight, and pull again with steady, slow pressure. This time it compresses smoothly, and the strap slides free without issue.
Step-by-Step Floss Reinstallation
- Prepare your new strap and identify which end has the spring bar already attached.
- Insert one end of the spring bar fully into its corresponding lug hole on the watch case. Push it in until you feel resistance and hear a small click.
- Position your new strap so it aligns with the lugs on both sides of the watch.
- Repeat the floss loop process on the opposite end: create a loop, thread the loose ends through, and pull to compress the second spring bar end.
- As the second bar compresses, guide the strap end toward the open lug hole and slide it into place.
- Release the floss and check that both spring bar ends are seated fully in their lug holes. Each should click securely and sit flush against the lug.
- Perform a gentle tug test on both ends of the strap to confirm the bars are locked in place.
Tool-Free Methods Compared
The table below shows how four common household methods compare in ease, risk level, and best use case:
| Method | Ease of Use | Risk Level | Best Use Case |
|---|---|---|---|
| Dental Floss | Medium | Low | All spring bar straps; safest option for first-timers |
| Credit Card | Medium | Medium | Tight lugs with minimal gap between strap and lug |
| Screwdriver | Hard | High | Drilled lugs only (external access holes); stubborn bars |
| Fingernail | Easy | Medium | Long nails and visible spring bar gaps only |
Why Floss Is the Safest Choice
Unlike metal tools, floss applies smooth, distributed pressure across the spring bar shoulder rather than a concentrated point. Metal screwdrivers and credit cards can slip and scratch the lug or strap if you miscalculate. Floss flexibility also means it adjusts to the exact shape of the spring bar, reducing the chance of gouges. The trade-off is that it requires a bit more setup and two-handed coordination, but this precision is worth it for a beginner who wants to avoid damage.
When Floss May Not Be Enough
If you pull the floss steadily and the spring bar does not compress after several gentle attempts, or if the floss keeps slipping into the narrow gap between the strap and case edge, do not force it. If the floss slips repeatedly into the gap, your lugs may be too tight for floss; try the credit card method. If the spring bar won’t compress even with gentle, steady pressure, there may be corrosion or a defect; professional help is safer. Continuing to pull harder risks damaging the floss or the strap itself.
Credit Card Method for Tight Spots
When dental floss won’t fit between the strap and lug, a plastic credit card or gift card can serve as a gentle prying tool. This method works best when lugs are positioned very close to the strap, leaving minimal gap for the floss loop. The credit card edge compresses the spring bar shoulder without requiring a specialized tool, though it carries a slightly higher risk of slipping than floss.
When to Use the Credit Card Method
Choose this method if your watch has tight lugs—that is, minimal gap between the strap and the lug protrusions on the watch case. You will know your lugs are tight if you struggle to fit even a thin piece of floss between the strap edge and the lug. The credit card approach also works well if the spring bar is particularly stubborn and floss alone does not seem to compress it enough.
Step-by-Step Credit Card Removal
- Lay the watch face down on a soft cloth and position one end of the strap so the spring bar is clearly visible from the back.
- Take a plastic card (credit card, gift card, or library card) and identify a smooth, thin edge with no cracks or rough spots.
- Gently slide the card edge between the strap and the lug, moving slowly toward the spring bar shoulder. Do not force it; if resistance is high, wiggle the card slightly to create a small gap.
- Once the card edge reaches the spring bar shoulder, apply gentle downward pressure. This compresses the spring bar inward, similar to how a spring bar tool works. You should feel slight give as the bar compresses.
- While maintaining gentle pressure, carefully slide the strap away from the watch case with your other hand. Move slowly and steadily; sudden movements cause the card to slip and may scratch the case.
- Once the strap is free, remove the card and set the strap aside.
Reinstalling the Strap with a Credit Card
Reversing the removal process requires similar care. Align the new (or existing) strap so one spring bar end sits in the lug hole. Slide the card between the strap and lug as before, apply gentle downward pressure to keep the spring bar compressed, and slide the strap into place. Release the card slowly and check that the spring bar clicks back into the lug hole. Repeat on the opposite end.
Credit Card Method: Gentle Prying in Practice
Imagine you have a metal watch with very snug lugs and you are attempting to slide a leather strap out using floss, but the loop cannot fit between the strap and lug edge. You select a smooth plastic card, slide its edge between strap and lug with minimal force, and feel it contact the spring bar shoulder. You then press down very gently—think of the pressure you would use to press a delicate button—and the spring bar yields slightly. You keep pressure steady while sliding the strap away. If the card suddenly slips or you feel the card edge catching on the case, you stop immediately, reposition the card, and try again with even lighter pressure. This incremental, controlled approach minimizes the risk of a slip-and-scratch.
Do and Don’t Checklist for Credit Card Use
- Do use a smooth, undamaged plastic card edge.
- Do keep the watch centered on the soft cloth throughout.
- Do apply steady, gentle pressure rather than sudden force.
- Do stop immediately if the card edge catches or begins to slip.
- Don’t use a card with rough, chipped, or jagged edges.
- Don’t apply force if you feel unusual resistance; reposition and try again.
- Don’t remove the card abruptly once the strap is loose; slide it out slowly to avoid scratching the lug.
Credit Card vs. Dental Floss: Pros and Cons
Dental floss is generally the safer choice because it does not slip as easily and poses a lower risk of scratching the case or lugs. The floss loop sits directly around the spring bar shoulder and tightens predictably. However, floss requires enough space between the strap and lug to thread the loop, which tight lugs may not allow. A credit card edge, by contrast, can work in very snug spaces and provides direct downward leverage. The trade-off is that the card can slip if not held steady, especially if the card edge is not perfectly smooth or if you press too hard too fast. If your watch has extremely tight lugs and floss proves impossible, the credit card method is a reasonable next step—but practice controlled, gentle pressure and stop if slipping occurs.
Screwdriver Method (For Drilled Lugs or Stubborn Bars)
A small flathead screwdriver can be effective when your watch has drilled lugs (small holes on the outside of the lugs) or when gentler methods like dental floss or a credit card have not budged a stubborn spring bar. This method requires a steady hand and careful positioning, as a metal tool near your watch case carries higher scratch risk than the floss or credit card approaches.
When to Use a Screwdriver
Drilled lugs are small external holes that allow direct access to push the spring bar inward from the side. If your watch has these holes, a screwdriver becomes a practical option for beginners. You may also turn to this method if you have tried the dental floss and credit card methods without success and the spring bar remains compressed or stuck. Always inspect your lugs first: drilled lugs have a visible small hole near the top or side of each lug. If you do not see drilled holes, the screwdriver method is not appropriate for your watch.
Step-by-Step Screwdriver Removal
Work slowly and deliberately. Rushing with a metal tool is the fastest way to cause scratches.
- Lay your watch face down on a soft cloth on a firm table. Ensure the strap is unbuckled and the workspace is well lit.
- Select a small flathead screwdriver with a blade no wider than the drilled lug hole. A jewelers screwdriver or precision set works well.
- Position the screwdriver tip into the drilled lug hole. Do not force it; it should slide in with minimal resistance.
- Apply gentle, steady inward pressure (toward the center of the watch) to compress the spring bar shoulder. You should feel or hear a slight click or give.
- While maintaining this light pressure, gently slide the end of the strap downward and away from the lug. The compressed spring bar should release from the lug hole, allowing the strap end to separate.
- Release the screwdriver and repeat steps 3 through 5 on the opposite side (the other spring bar end).
- Once both spring bar ends are free, remove the old strap completely.
Step-by-Step Screwdriver Reinstallation
- Align the new strap with the watch lugs, positioning one spring bar end into the upper lug hole.
- Press the spring bar end gently into the lug hole until you feel it seat and snap into place. You may hear a subtle click.
- Repeat for the second spring bar end on the opposite side.
- If the spring bar does not snap in easily, do not force it. Instead, use the screwdriver again: insert the tip into the drilled lug hole and gently compress the bar as you guide the strap end into the lug hole.
- Once both ends are seated, tug the strap gently on both sides to confirm a secure fit.
Concrete Example: Using a Screwdriver on Drilled Lugs
Imagine your watch has visible small holes on the outer edge of each lug at the 12 and 6 o’clock positions. You position your screwdriver tip into the hole nearest the strap, apply steady inward pressure for a count of two, and then gently pull the strap downward. The spring bar compresses and releases, and the strap end slides free. You do the same on the opposite lug, then swap to your new strap using the same technique to reinstall.
What Could Go Wrong: Screwdriver Slip and Corrective Action
The most common mistake is the screwdriver slipping out of the drilled lug hole and sliding across the case or strap. If this happens, stop immediately. Reposition your screwdriver with better lighting, or improve your grip and hand stability. If the watch case or strap shows even a light scratch, switch back to the dental floss method or the credit card method, as those carry lower scratch risk. If repeated gentle attempts with the screwdriver still cause slipping or scratching, move on to the section “When a Tool Is Still Necessary (And Alternatives)” to determine whether professional help is the safer choice.
Key Cautions for Beginners
- Use only a small flathead screwdriver; larger blades increase the risk of slipping and damaging the case or strap.
- Apply only light, steady pressure. Forcing the screwdriver or pressing hard will not speed up the process and increases scratch risk.
- Keep the watch face down and the blade horizontal as much as possible to prevent the tool from contacting the lens or case sides.
- If you feel the screwdriver catch or bind, do not twist or lever the handle. Instead, back out slowly and reposition.
- Stop after two or three gentle attempts per spring bar. If the bar does not budge, repeated force risks bending the bar or scratching the case; floss method or professional help is safer.
Quick Release and Pass-Through Straps (Truly Tool-Free)
If your watch has a quick release strap or a single-piece pass-through design like NATO, Zulu, or Perlon straps, you are in the easiest category: no spring bar handling or tools are needed at all. These straps are built for simplicity and represent the most stress-free swap experience for beginners.
Quick Release Straps: The Easiest Option
A quick release strap has a small built-in lever or button on the underside of the strap, usually near where it connects to the watch case. When you press or pull this lever, it retracts the spring bar automatically, allowing the strap to slide free without any external tool or technique.
To identify a quick release strap, flip your watch over and look along the inside edge where the strap meets the case. You will see a small lever, button, or tab. The lever is usually a small metal or plastic tab roughly the size of a pinhead to a button. When you press or slide it, you will hear or feel a subtle click. Some designs use a side-mounted button rather than an underside lever, so inspect both the inside edge and the sides where the strap meets the lug. If you see one, you have a quick release strap.
Here are the steps to remove and reinstall a quick release strap:
- Place the watch face-up on your soft cloth workspace.
- Locate the quick release lever on the underside of the strap, near the lug.
- Gently press or pull the lever (depending on the design) until you feel or hear a click. The spring bar will retract into the strap.
- While holding the lever in the retracted position, gently slide the strap away from the case. The spring bar will remain compressed inside the strap.
- Align the spring bar of the new strap with the lug hole on the watch case.
- Slide the new strap onto the watch. The lever on the new strap will be in the open position; as you push it into place, the lever will reset and lock the spring bar into the lug.
- Release the lever. You should hear or feel a click, confirming the strap is secure.
- Tug gently on both ends of the new strap to verify it is locked in place.
Example scenario: You have a watch with a quick release strap. You press the small black lever on the underside, and it clicks inward. The strap slides off easily. You align the new strap’s spring bar with the lug hole and push it down until it snaps into place with a satisfying click.
If the lever does not retract smoothly or feels stuck, do not force it. Inspect the lever for debris or damage. A stuck quick release mechanism may require professional attention.
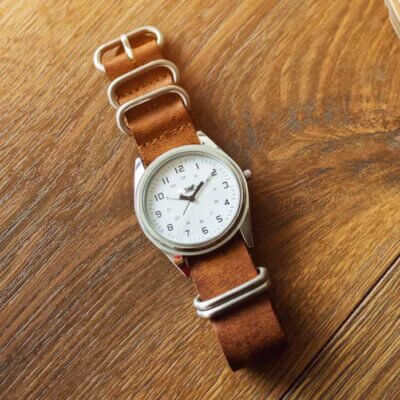
Pass-Through Straps: NATO, Zulu, and Perlon Designs
Single-piece pass-through straps like NATO, Zulu, and Perlon variants thread through the watch lugs and sit under the case. No spring bars are involved, so you simply slide the strap through and out. This design is inherently tool-free and beginner-friendly.
To remove a pass-through strap:
- Place the watch face-up on your soft cloth workspace.
- Locate where the strap passes under the watch case between the lugs. You may see small keeper loops or slots that hold the strap in place.
- Gently slide the strap backward out from under the case, thread by thread if necessary. There is no spring bar to compress, so motion is straightforward.
- Once the strap is free, inspect the lugs and case for any dust or debris and wipe gently with the cloth.
To install a pass-through strap:
- Take the new strap and identify the two ends. One end typically has a buckle or closure; the other is a tail.
- Align the strap so that it will thread under the case with the buckle end on the side you prefer (usually your wrist’s inner side when wearing).
- Slide one end of the strap up through the lug hole and under the case, moving it toward the opposite lug.
- Thread the other end of the strap through from the opposite side, so it passes completely under the case.
- If the strap has keeper loops, feed the loose tail through the keepers to hold it in place and prevent it from sliding back.
- Adjust the fit so the strap sits evenly on both sides and tighten any keeper loops.
- Fasten the buckle or closure and test the fit on your wrist.
Example scenario: You are removing an old NATO strap from your watch. You grip the buckle end and gently slide the strap backward from under the case. It comes free with minimal resistance. You then take the new NATO strap, thread it up through one lug, under the case, and out through the opposite lug. You feed the tail end through the nylon keeper loops to secure it, and the swap is complete.
For more detailed NATO strap fitting tips, consult the dedicated guide to ensure even sizing and proper keeper placement.
Quick release and pass-through straps are inherently tool-free because they have no hidden spring bar compression step. This eliminates a common source of scratches. For readers who swap straps often, these designs offer convenience, though traditional spring bar straps remain the most common and durable option.
Some watch owners invest in straps with built-in quick release levers, which eliminate the need for removal or compression technique entirely.
When a Tool Is Still Necessary (And Alternatives)
Not every watch strap can be changed without proper tools, and knowing when to stop is just as important as knowing how to proceed. Understanding your limits helps you avoid damaging your watch and keeps you safe.
Situations Where Tool-Free Methods May Not Work
Even with patience and the right technique, some watches present genuine obstacles to tool-free strap changes.
Very tight lugs with minimal gap between the strap and the case are among the most common blockers. If there is barely any space to insert dental floss, a credit card, or even your fingernail, the traditional methods become nearly impossible. In these cases, the spring bar is difficult to access, and forcing a tool or improvised object into the gap risks scratching the watch case or damaging the strap.
Metal bracelets and end links (the metal loops at the strap ends on some watches) operate differently than fabric or leather straps. They often require a specialized technique and sometimes a dedicated tool to release safely. If your watch has a metal bracelet, tool-free methods are generally not reliable.
Stubborn spring bars that refuse to compress after several gentle attempts signal that something is wrong. This may mean corrosion, a manufacturing defect, or a spring bar that is simply too stiff for improvised leverage. Continuing to apply pressure with jury-rigged tools risks slipping and scratching the case.
When to Stop and Get Help
The following signs mean you should set the watch aside and seek professional help or a proper tool.
- You notice new scratches forming on the case, lugs, or strap material, or your tool keeps slipping off the spring bar.
- You have made three to five gentle, careful attempts to compress the spring bar, and it has not moved or given way at all.
- You cannot clearly see or locate the spring bar shoulders or the holes in the lugs, even with good lighting and magnification.
- The gap between the strap and lug is so tight that you cannot insert even a thin piece of dental floss or a credit card edge.
- The watch has a metal bracelet or end links, and you are unsure how the mechanism works.
Household Backups and Cautions
A toothpick is sometimes mentioned as a last-resort option for very tight spaces where dental floss or a credit card cannot fit. However, toothpicks are fragile and can break inside the gap, creating splinters that damage the watch. They also provide minimal control and slip easily under pressure. A toothpick should only be considered if you have already verified that the spring bar is accessible, your strap has been off before without damage, and you are willing to accept a very high breakage and scratch risk. If a toothpick breaks, extraction by a professional may be necessary. Do not attempt this method unless you have exhausted safer alternatives and understand the increased risk of permanent damage.
Decision Checklist: Know When to Try and When to Stop
Use this quick flowchart to decide your next step.
- Start with the dental floss method. If the floss loop seats around the spring bar shoulder and you can pull with steady tension, proceed with removal.
- If dental floss does not work (the loop slips, or the bar does not compress), try the credit card method. Slide the card edge gently into the gap and apply light pressure on the spring bar.
- If the credit card method fails or the gap is too tight, check whether your watch has drilled lugs (small holes visible on the outside of the lugs). If yes, you may carefully try the screwdriver method with a very small flathead screwdriver.
- If your watch does not have drilled lugs, the gap is too tight for a card, and the spring bar still has not moved, stop. Do not force the issue further. Seek professional help.
- If you see scratching, the tool keeps slipping, or the spring bar shows no sign of compression after gentle attempts, stop immediately. The watch may need a professional touch or a proper spring bar tool.
Professional Alternatives
Many jewelry stores, watch retailers, and watch repair shops will change your strap for you, often at a modest cost. This is a safe option if you are uncomfortable proceeding on your own, if your watch has tight lugs or a metal bracelet, or if you lack confidence in your steady hand. A professional has the right tools and experience to avoid damage, and the peace of mind is often worth the small fee.
Common Beginner Mistakes and Fixes
Even with the safest methods, small errors can lead to a misaligned strap, a spring bar that does not seat properly, or unwanted scratches. Here are the most common pitfalls beginners encounter and how to fix them.
Wrong Strap Orientation
The most frequent mistake is installing the strap backwards or upside down. Your watch strap should always be oriented so that the buckle or fastener sits at the 12 o’clock position (the top of your wrist when wearing the watch). If you install it reversed, the strap will feel uncomfortable, may not secure properly, and the spring bars may not seat evenly in both lugs.
To fix this: Simply remove the strap and flip it so the buckle points upward. When you reinstall it, verify that both spring bar ends click or snap into place with equal pressure. If one side feels looser than the other, the strap is likely still reversed or misaligned.
Scratches and How to Prevent Them
Scratches typically occur when you rush, apply uneven pressure, or forget to protect the watch case. The most common causes are:
- Sliding a credit card or screwdriver without a soft cloth underneath the watch
- Pressing too hard or at the wrong angle, causing the tool to slip onto the case
- Poor lighting that makes it hard to see where your tool is going
- Not fully understanding where the spring bar actually sits, so you press on the case instead
Fixes: Always place a soft cloth under your watch before starting. If you notice scratching beginning, stop immediately, switch to the dental floss method, and give your hands a moment to steady. Ensure you have good lighting directly on the watch. If a credit card or screwdriver keeps slipping, the floss method is more forgiving and reduces slip risk. If neither floss nor a card works and scratching is becoming an issue, professional help is the wisest choice. You can also review “Avoid these strap damage issues” in our maintenance content to learn how to minimize future damage.
Spring Bar Not Seated Properly
A spring bar that is not fully seated will feel loose, the strap may shift sideways, or it may pop out unexpectedly when you wear the watch. This usually happens when you do not push down hard enough on the spring bar shoulder as you reinsert it, or when the spring bar is bent.
To verify and fix: After reinstalling the strap, gently push down on the spring bar from the side to ensure it clicks into both lug holes. You should feel slight resistance and hear a small click. If it feels spongy or loose, remove the strap and try again, pushing the spring bar end into the lug hole with a firm, steady motion. If it still will not seat after two or three careful attempts, the spring bar may be bent or the lug holes may be slightly damaged—at that point, it is time to seek professional help or replace the strap.
Beginner Mistakes Checklist
Before you finish, run through this quick list to catch common errors:
- Did you protect the watch case and lens with a soft cloth?
- Is the buckle or fastener pointing at 12 o’clock (top of the watch)?
- Did you verify that both spring bar ends are fully seated in their lug holes?
- Did you test the strap on your wrist before calling it done?
- Did you check the case, lugs, and strap for any new scratches or damage?
Post-Change Verification: Secure Fit Checklist
A properly installed strap should feel snug and secure. Use this four-point verification to confirm everything is correct:
- Tug both ends of the strap firmly (away from the watch) to ensure neither end moves or slides out.
- Check alignment: the strap should sit evenly in both lugs with no visible gaps or tilting.
- Test on wrist: fasten the watch around your wrist and wear it for a minute or two. It should not shift, slip, or feel unstable.
- Inspect for damage: look at the watch case, lugs, lens, and strap for any new scratches, dents, or marks you did not notice before.
If all four checks pass, you have successfully changed your watch strap. If the strap feels loose or misaligned after the tug test, remove it and reseat both spring bar ends one more time, pushing firmly until you feel them click into place.
FAQ
Here are answers to common questions beginners ask when changing a watch strap without a dedicated tool.
How do you change a watch band without a spring bar tool?
The safest method is using dental floss to compress the spring bar and slide the strap out. Loop the floss around the spring bar shoulder, pull it toward you, and the bar will compress, releasing the strap. Alternatively, if your watch has drilled lugs, a small screwdriver can gently press the bar inward. If your strap is quick release or a NATO pass-through type, no compression is needed at all.
What are quick release straps?
Quick release straps have a built-in lever or button on the underside that you press or slide to retract the spring bar automatically. This means you can remove and attach them in seconds without any tool or compression technique. Look for a small button or lever near where the strap meets the watch case to identify one.
Can I use dental floss to remove spring bars?
Yes, dental floss is the safest household method for traditional spring bar straps. Make a loop with the floss, thread it around the spring bar shoulder, and pull firmly in the direction that compresses the bar into the watch case. The floss creates a secure grip without scratching the case or strap the way a metal tool might. You can also use any thin, strong string in place of dental floss.
What if my strap is a NATO or Zulu style?
NATO, Zulu, and Perlon straps are single-piece designs that slide directly through the watch lugs without using spring bars at all. Simply pull the strap straight out from under the lugs; no tool or compression technique is needed. Reinstalling is equally simple: thread the new strap through both lugs from underneath and ensure it sits flat against the case.
How do I know if my watch has drilled lugs?
Drilled lugs have small holes visible on the outer side of the arms where the watch case meets the lugs. If you see these holes, a small flathead screwdriver can be inserted through them to gently press the spring bar inward, making removal easier. Without drilled lugs, stick to the dental floss or credit card method to avoid accidentally slipping and scratching the case.
When is a tool still necessary?
A dedicated spring bar tool becomes helpful if the lugs are extremely tight with almost no gap, the spring bar refuses to compress after several gentle attempts, or you are working with a metal bracelet that has end links requiring spring bar tool precision. If you reach that point, it is safer to visit a watch professional than to force the removal and risk damage.
What should I do if the spring bar won’t compress?
First, ensure you are pulling in the correct direction—toward you, which pushes the bar into the watch case. If the floss or card slips, reposition it so it grips the spring bar shoulder firmly and try again with steady, even pressure. If the bar still will not budge after two or three gentle attempts, stop and do not force it; rough handling can bend the bar or scratch the case. At that point, seek professional help.
How do I verify the new strap is secure?
After installing the new strap, pull firmly on both ends of the strap to confirm the spring bar has popped back into place and the strap does not slide free. Check that the strap aligns evenly with the case and sits flat against the lugs. Finally, wear the watch for a few minutes and do another gentle tug test. If the strap holds firmly and feels stable on your wrist, the installation is complete and safe.
What exactly is a spring bar and how does it work?
A spring bar is a small metal rod with an internal spring mechanism. It sits horizontally inside the lug holes on your watch case and is pushed outward by the internal spring, which keeps tension on both ends. This tension holds the strap securely in place. When you compress the spring bar inward (using floss, a card, or a tool), the internal spring allows the bar to retract, releasing the strap from the lug holes. The bar springs back outward when you release the compression, locking the new strap into place. Understanding this mechanism helps explain why all removal methods focus on compressing the bar: you are simply overcoming the internal spring pressure temporarily.