Why Your Watch Fit Matters (& Why You Should Resize)
A metal watch bracelet that does not fit properly is more than just uncomfortable—it can damage your watch and undermine your daily experience. Whether your bracelet is too loose or too tight, the consequences compound over time. The good news is that resizing a metal watch bracelet at home is entirely achievable for beginners, and doing so yourself saves money while giving you confidence in basic watch maintenance.
The Problem With a Loose Bracelet
When a bracelet is too loose, the watch slides and flops on your wrist with every movement. This constant motion increases the risk of scratches and impacts to the watch case and crystal, as the watch knocks against door frames, desks, and your other wrist. Beyond cosmetic damage, excessive movement stresses the internal spring bars—the small metal components that attach the bracelet to the watch case—and can bend or weaken them over time. A loose fit also looks unprofessional and feels unstable, creating an everyday annoyance and a nagging sense that something is not quite right.
More critically, a bracelet that slides freely can snag on clothing or objects, risking both the watch and your safety. The metal links may catch unexpectedly, and the watch itself may slide down far enough to strike something hard.
The Problem With a Tight Bracelet
Conversely, a bracelet that is too tight creates constant wrist pressure, leaving marks on your skin and causing discomfort throughout the day. Tightness also accelerates wear on the bracelet itself: the links and pins experience continuous stress as the bracelet resists movement, which can lead to premature failure of the connection points.
A tight fit often masks another issue: an off-center clasp. When you remove links from only one side of the bracelet instead of both sides equally, the clasp drifts away from the center. This means the clasp can press unevenly against your wrist, creating localized discomfort and an asymmetrical appearance.
Why You Should Resize Your Bracelet
A correctly sized bracelet sits snugly on your wrist without cutting off circulation or sliding. It protects your watch from impact and scratching, reduces wear on the spring bars and link pins, and gives your timepiece a polished, intentional look. Most importantly, it feels good to wear all day.
Professional watch sizing at a jewelry shop or dealer can cost $30–$75 and requires a turnaround time. Resizing your own metal watch bracelet at home eliminates that cost and gives you the ability to make adjustments whenever your needs change—after weight loss or gain, seasonal swelling, or simply to experiment with fit. Learning this skill builds confidence and connects you to your watch in a meaningful way.
The process is straightforward, does not require expensive equipment, and is safe when you follow the correct technique: work slowly, use gentle controlled taps instead of forcing parts, and keep your small components organized so nothing is lost. Even if you have never adjusted a watch before, the step-by-step guidance in this guide will walk you through each decision and action.
Tools You’ll Need (& Where to Get Them)
Resizing a metal watch bracelet at home does not require a professional workshop—just the right tools. Below is a breakdown of what you actually need, where to find them, and what to avoid so you can work safely without damaging your watch.
Essential Tools
These four tools form the backbone of any DIY watch bracelet adjustment:
- Pin pusher tool (ideally 0.8mm diameter with a fine, rounded tip): Safely removes pins without slipping or gouging links. This is the primary method for pressure pins and is worth investing in specifically.
- Small hammer or mallet (lightweight, precision-focused): Delivers controlled, gentle taps to push pins in and out. A standard hammer is too heavy; a jewelry or hobby hammer is ideal.
- Bracelet holder or sizing block (padded vice-grip style): Stabilizes your bracelet during work, protecting the finish from scratches and keeping both hands free for tools.
- Soft, lint-free cloth (microfiber or cotton): Prevents scratches on the bracelet surface and creates a clean workspace for tiny parts.
Helpful Tools
These tools make the job easier and safer, especially if your bracelet uses screw-in pins or if you encounter resistance:
- Spring bar tool (thin, flat spoon-shaped end): A versatile backup for pin pushing and essential if your bracelet has spring bars or a sliding clasp. Many watch shops include one with purchases.
- Needle-nose pliers (fine-tipped, non-marring): Grip and carefully extract stubborn pins without crushing them; useful for handling small parts.
- Small screwdrivers (typically 1.4–1.6mm flathead): Required only if your bracelet uses screw-in pins. Correct sizing is critical to avoid stripping screw heads.
- Parts tray or small container: Prevents losing tiny pins and screws; a shallow dish or tray with compartments works well.
- Magnifying glass or jeweler’s loupe (optional): Helps you see arrow indicators and screw slots clearly, especially under dim lighting.
Optional and Advanced Tools
Use these only in specific situations:
- Specialty watch link removal tool (lever-based mechanical tool): An alternative to the pin pusher method; useful if you plan to resize multiple watches, but not necessary for a first adjustment.
- Loctite or thread lock compound (optional for screw-in pins): Adds security to prevent screws from loosening over time. Optional for beginners who may adjust the bracelet again soon.
- Penetrating oil (used cautiously): A last resort for pins that refuse to budge; apply sparingly and only after confirming direction and alignment are correct.
The following table summarizes all tools, their necessity, and alternatives:
| Tool | Essential? | Purpose | Alternative |
|---|---|---|---|
| Pin pusher tool | Yes | Safely remove and insert pressure pins without slipping | Spring bar tool (if fine enough; less precise) |
| Small hammer or mallet | Yes | Deliver controlled taps to drive pins in and out | Plastic mallet or rubber-headed hammer |
| Bracelet holder or sizing block | Yes | Stabilize bracelet and protect finish from scratches | Cloth-padded vise or wooden block with grooves (careful) |
| Soft, lint-free cloth | Yes | Protect bracelet surface and contain small parts | Microfiber cloth, soft cotton towel |
| Spring bar tool | No | Remove spring bars; backup pin pusher | Thin flathead screwdriver (if sized correctly) |
| Needle-nose pliers | No | Grip and extract stubborn pins safely | Tweezers (less gripping power) |
| Small screwdriver (1.4–1.6mm flathead) | Conditional (for screw-in pins) | Remove and install screw-in pins without stripping | Correctly sized bit in a pin vise (if available) |
| Parts tray or small container | No | Organize and prevent loss of pins and screws | Small dish, envelope, or labeled cup |
| Magnifying glass or loupe | No | See arrow indicators and screw heads clearly | Good natural lighting; smartphone camera zoom |
Where to Buy and What to Avoid
Watch bracelet adjustment tool kits are available from several sources:
- Specialized online retailers and watch-modding shops offer curated kits ranging from budget ($20–$30) to professional ($100+). Budget kits are adequate for one-time use; professional kits offer better durability if you plan to adjust multiple watches.
- Local watch repair shops: Many will sell individual tools or starter kits at moderate prices and can advise on your bracelet type before you buy.
- General online marketplaces: Generic tool sets are available but quality varies. Check reviews carefully for reports of tools slipping, scratching, or poorly fitting screwdriver bits.
Avoid these mistakes when shopping:
- Do not buy cheap generic “pin punch” sets designed for automotive work; they are too large and will damage watch links.
- Do not buy screwdriver sets with incorrectly sized bits (too large or oversized flatheads strip watch screws). Confirm bit diameter matches your bracelet’s screw heads before purchasing.
- Do not assume a spring bar tool is a substitute for a proper pin pusher; they serve different purposes and a spring bar tool is less precise for pins.
- Do not buy low-quality holders or vises with rough padding; they will scratch your bracelet. Look for padded or lined versions explicitly marketed for watch work.
Shopping Guide by Bracelet Type
Before you buy, identify your bracelet type to prioritize tools:
- If your bracelet uses pressure pins (cotter pins): prioritize a quality pin pusher tool, small hammer, and bracelet holder. These three items are the core of a successful adjustment.
- If your bracelet uses screw-in pins: prioritize a correctly sized screwdriver (confirm diameter first by inspecting your bracelet). A small hammer and holder are still helpful but secondary.
- If you are unsure: start with a basic kit that includes both a pin pusher and small screwdriver, plus a holder and cloth. This covers both common types.
- If you are completely unsure of your bracelet type: start with a comprehensive kit that includes pin pusher, small screwdriver, holder, hammer, and pliers. This covers both pressure and screw-in systems and reduces the risk of buying the wrong tool.
Next, set up a safe and organized workspace before you begin.
Workspace Setup — Preparing for Success
Before you remove a single pin or screw, invest five minutes in creating a safe, organized workspace. A poor setup leads to lost parts, scratches on your bracelet, and frustration. A good setup makes the entire process smooth and confident.
Choose Your Work Surface
Work on a flat, stable table or desk—never on your lap, bed, or carpet. A stable surface keeps your bracelet steady while you work and prevents accidental drops. Carpet is especially dangerous because small pins and screws vanish into fibers and are nearly impossible to recover. If you must work near carpet, place a large cloth or tray on the floor to catch falling parts.
Set Up Lighting
Good lighting is essential. Arrow indicators on the underside of links, screw heads, and grooves are small and easy to miss in dim light. Position a desk lamp or work light directly over your workspace, or work near a window during daylight. You need to see exactly where the pin/screw is oriented before you touch it.
Protect Your Bracelet
Lay a soft, non-abrasive cloth—such as microfiber, lint-free fabric, or a soft watch case cloth—over your work surface. This cloth protects the bracelet’s finish from scratches caused by tool slips or contact with the hard table. It also dampens the sound of tapping and gives you a slightly cushioned, stable base for your bracelet.
Organize Your Parts and Tools
Place a small parts tray, shallow dish, or container within arm’s reach. Every pin, screw, and small link you remove goes directly into this tray. Do not set parts on the table, in your lap, or on a separate surface—they will roll away or disappear. Arrange your tools in the order you will use them so you are not fumbling mid-process. A cluttered workspace invites mistakes and accidents.
Workspace Setup Checklist
- Flat, stable table or desk (not lap, bed, or carpet)
- Strong lighting (desk lamp or daylight) directed at the work area
- Soft, non-abrasive cloth spread over the work surface
- Small parts tray or container within reach
- Tools laid out in the order you will use them
- Phone or reference material (this guide or a video) nearby for quick checks
- Small trash bag or container for discarded packaging or cloth bits
Good Setup vs. Bad Setup
| Good Setup | Bad Setup |
|---|---|
| Bright overhead lamp or window light | Dim light or relying on ceiling fixture only |
| Stable table or desk | Work surface is lap, bed, or carpet |
| Soft protective cloth covering work surface | Hard table or carpet exposed directly |
| Parts tray within arm’s reach | Parts scattered on table, rolling away |
| Tools arranged in order of use | Tools mixed in a pile, hard to find |
Once your workspace is ready, you are prepared to begin the measurement and removal process.
Step 1 — Determine How Many Links to Remove
Before you touch any tools, you need to know exactly how many links to remove and from where. This measurement step is the foundation of a successful resize and prevents the frustration of removing too many links, too few, or from the wrong spots.
Wear and Pinch Method
Put the watch on your wrist without making any adjustments. It will feel loose—that’s fine. Now, find the clasp (the fastening mechanism at the front of the bracelet) and pinch the bracelet gently where it bunches up near the clasp. This tells you how much excess material you have. Pinch until the watch sits snugly on your wrist with about one finger’s gap between the bracelet and your skin. A comfortable fit means the watch doesn’t slide around when you move your arm, but you can still fit one finger underneath.
Count the extra links in the bunched section. Make a note of the number. This is your removal target.
Identify Removable Links
Not all links on a metal bracelet can be removed. Flip your bracelet over and examine the underside of the links. Look for small arrow indicators stamped or engraved into the surface. These arrows point in the direction the pin should be pushed out. Links with arrows are removable links—the others are fixed and should be left alone.
If you don’t see arrows or any indicators, check your watch’s manual or the manufacturer’s website for your specific model. Some bracelets use different marking systems, and a few high-end bracelets have all removable links without arrows. When in doubt, stop here and verify before proceeding.
The Symmetry Rule — Why It Matters
This is critical: remove an equal number of links from both sides of the clasp. If you remove three links from one side and two from the other, the clasp will sit off-center on your wrist. An off-center clasp can look asymmetrical and may press unevenly against your wrist, creating discomfort and an uneven wear pattern.
Example: if you need to remove four links total, remove two from the top side of the clasp and two from the bottom side. Write this down before you start.
Try These First: Micro-Adjustment and Half-Links
Before committing to removing full links, check whether your watch has easier adjustment options.
Many modern bracelets include a micro-adjustment clasp. This is a small mechanism on the clasp itself that allows you to shift the clasp position slightly—usually by one or two notches—without removing any links. It’s the easiest option. Flip your clasp over and look for small notches or slots. If you see them, try moving the clasp slightly before proceeding to link removal. This may solve your fit problem without any tools.
Half-links are removable links that are noticeably shorter than standard links, allowing you to remove material in smaller increments. If your bracelet includes them (they’re visibly shorter than standard links), you can remove a half-link instead of a full link. This lets you adjust by smaller increments. For example, if removing a full link seems too much, try removing one half-link from each side first.
The order of easiest to most involved is: micro-adjustment first, then half-links, then full link removal. Move down this list only if the previous option didn’t achieve your desired fit.
Create Your Removal Plan
Write down your plan before touching tools. Here’s a template:
- Total links to remove: [number]
- Links to remove from top side of clasp: [number]
- Links to remove from bottom side of clasp: [number]
- Using micro-adjustment first? Yes / No
- Removing half-links? Yes / No
Keep this note nearby as you work. It prevents confusion and keeps you accountable to the symmetry rule.
Identify Your Pin Type — Pressure or Screw-In?
Before you remove any links, you need to identify which pin system your bracelet uses. The two most common types are pressure pins and screw-in pins. Each requires a different approach, and using the wrong method can damage your bracelet. Take a few minutes now to inspect your links—it will save you time and frustration later.
Understanding the Two Main Pin Types
A pressure pin (also called a cotter pin) is a solid pin that holds links together through a split design. When you look at the pin from the side, you will see a small groove or split running down its length. The pin is held in place by friction and tension, not by any fastening mechanism. Removing it requires pushing it out with a pin pusher tool and a gentle tap from a hammer.
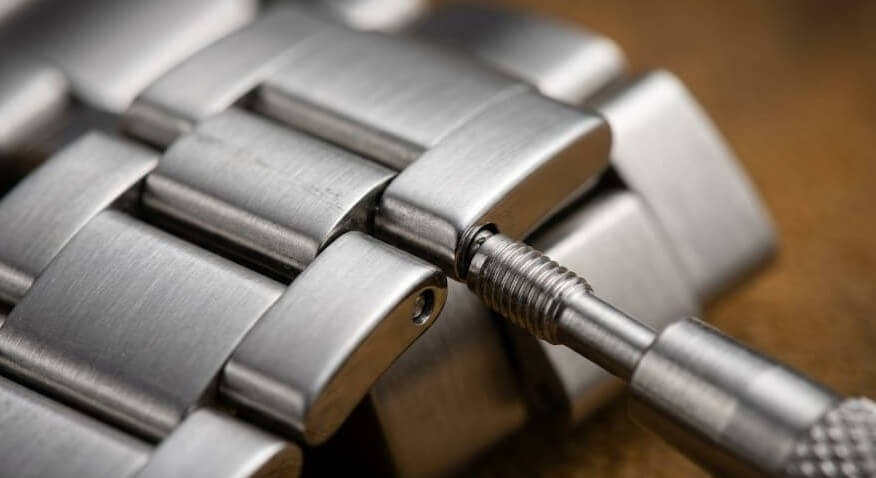
A screw-in pin, by contrast, has a visible screw head or slot on the link. This pin is threaded and fastened by turning it counterclockwise with a small screwdriver. The screw-in design offers extra security, but requires care to avoid stripping the screw head.
How to Inspect Your Bracelet
Follow these steps to identify your pin type:
- Look at the side of a removable link and check for a visible screw head or slot. If you see either, you have a screw-in pin bracelet. If not, move to step 2.
- Examine the underside of the link. You should see small arrow indicators pointing in one direction. Arrows indicate a pressure pin system. The arrow shows you which direction to push the pin out.
- If you see a split or groove running lengthwise down the pin itself, you have a pressure pin.
- If your link does not match these descriptions—for example, if it appears to have a barrel or collar around the pin, or if the pin design looks unusual—consult your watch brand’s specifications before proceeding. Specialty systems like pin and collar, U/L pin bracelets, and folded link designs may require different techniques.
Write down your pin type before moving forward. This simple step prevents mistakes during removal.
Pin Types Comparison
Use this table to confirm your pin type and understand the tools and difficulty level for each:
| Pin Type | Tool(s) Required | Difficulty | Removal Direction | Notes |
|---|---|---|---|---|
| Pressure Pin (Cotter) | Pin pusher, hammer, bracelet holder | Beginner | Follow arrow indicators on link underside | Most common; friction-based; gentle taps required |
| Screw-In Pin | Correctly sized small screwdriver | Beginner to Intermediate | Counterclockwise rotation | Risk of stripping if wrong screwdriver size used; two-piece design on some models |
| Pin and Collar | Pin pusher, hammer, bracelet holder | Intermediate | Push out per brand specifications | Rare; found on higher-end watches; collar surrounds pin; consult specs |
| U/L Pin Bracelet (Folded Link) | Pin pusher, hammer, bracelet holder | Intermediate | Per brand design; often requires special technique | Less common; folded link design; pause and verify specs before attempting |
Decision Tree: Which Method Should You Use?
Ask yourself these questions in order:
- Does your link have a visible screw head or slot? If yes, use the screw-in method (Step 3). If no, go to question 2.
- Do you see arrow indicators on the underside of the links, or a split/groove down the pin? If yes, use the pressure pin method (Step 2). If no, go to question 3.
- Does the pin have a collar or barrel around it, or does the design look unusual? If yes, stop and check your watch brand’s specifications before proceeding. If the design matches standard pressure or screw-in cues after review, proceed with the appropriate method.
Write down your answer and keep it visible as you work through the next steps.
Key Tool Differences
Pressure pin bracelets require a pin pusher tool, a hammer or mallet, and a bracelet holder (sizing block) to protect the bracelet while you work. The holder keeps the bracelet stable and prevents scratches.
Screw-in pin bracelets require only a small screwdriver that fits the screw slot perfectly. Choosing the wrong screwdriver size is the most common cause of damage—an oversized or undersized driver will cam out (slip) or strip the screw head, ruining the link. If you do not have a correctly sized screwdriver, do not attempt screw-in removal.
Once you have confirmed your pin type and gathered the correct tools, you are ready to move to the next step: removing the links.
Step 2 — Remove Links (Pressure Pin Method)
Before you begin, confirm that you have completed your measurement and written down exactly how many links you need to remove from each side of the bracelet. Double-check the arrow indicators on the underside of the links to ensure you are pushing in the correct direction, and verify that you are removing an equal number of links from both sides to keep the clasp centered.
Pre-Removal Checklist
- Measurement plan documented (number of links, which side, which specific links)
- Arrow direction verified on the underside of each link you will remove
- Equal links marked for removal from both sides of the clasp
- Bracelet holder or soft cloth workspace prepared
- Pin pusher, hammer, needle-nose pliers, and parts tray positioned within reach
- Lighting positioned to see arrow indicators clearly
Removal Steps
Step 1: Position the bracelet. Lay the bracelet flat and level on your workspace. If using a bracelet holder or sizing block, place the bracelet with the arrow indicators pointing downward into the holder. If working on a soft cloth instead, stabilize the bracelet firmly so it does not shift during tapping. The bracelet must remain perfectly still to prevent pins from bending or the pin pusher from slipping and scratching the metal.
Step 2: Align your pin pusher. Select the first link you are removing based on your measurement plan. Position the tip of the pin pusher directly onto the end of the pin, ensuring the pusher is perfectly straight and perpendicular to the link. The pusher should sit flush against the pin head with no angle or tilt. A misaligned pusher will slip sideways, bend the pin, or leave marks on the bracelet. Take a moment to verify alignment before tapping.
Step 3: Tap gently and deliberately. Hold the pin pusher steady with one hand. Using your small hammer or mallet, strike the top of the pusher with controlled, gentle taps. Each tap should be light and precise, not a heavy blow. The goal is to gradually push the pin out, not to force it in one hard strike. After every two or three taps, pause and assess how far the pin has moved. You will feel a slight resistance as the pin slides out; this is normal. Continue tapping until the pin protrudes far enough on the opposite side that you can grasp it with needle-nose pliers.
Step 4: Extract the pin with pliers. Once the pin has been pushed out partway, use needle-nose pliers to gently grasp the protruding end and pull the pin the rest of the way out. Do not yank forcefully; pull steadily and calmly. The pin should slide out smoothly. If you encounter significant resistance or the pin refuses to budge, stop immediately and consult the troubleshooting section below.
Step 5: Remove and store the link. With the pin fully extracted, gently separate the link from the bracelet by hand. Immediately place both the pin and the removed link into your parts tray. Never set small parts down loose on the table or let them roll away. Losing even one pin or link will leave your bracelet incomplete and your work unfinished.
Step 6: Repeat symmetrically. Move to the matching link on the opposite side of the clasp. Follow steps 2 through 5 again, removing the same number of links from this side. This symmetry rule is critical: removing links from only one side will cause the clasp to sit off-center, creating an uncomfortable, lopsided fit. The off-center clasp may press directly against your wrist bone, causing irritation during wear. Always maintain balance.
Step 7: Continue for all planned removals. If your measurement plan requires removing two links from each side, repeat the process for the second link on each side. Work methodically and do not rush. Check your measurement plan after each link removal to confirm you are on track.
During-Adjustment Checklist
- Pins placed in parts tray immediately after removal
- Arrow direction confirmed before pushing each pin
- Gentle taps only—no forcing or heavy hammer strikes
- Bracelet remains stable in holder or on padded surface
- Equal number of links removed from both sides of clasp
Pin Won’t Come Out? Troubleshooting Branches
If a pin refuses to move after several gentle taps, work through the following checks before applying any force:
- Confirm direction: Double-check the arrow indicators on the underside of the link. The arrow shows the direction the pin should exit. If you have been pushing against the arrow instead of with it, you are pushing the wrong way. Reverse direction and try the other end of the pin.
- Try the other end: Some pins can be pushed from either end. If one end resists, carefully flip the bracelet or reposition it so you can access the opposite end of the same pin. Tap from that direction instead.
- Stop if resistance is strong: If the pin still does not move after you have verified direction and tried both ends, do not escalate to hard hammering or force. Forcing can bend the pin permanently, strip the link hole, or damage the bracelet finish beyond repair. Step back and reassess.
- Optional: penetrating oil (last resort). If the pin is genuinely stuck, apply a tiny amount of penetrating oil (such as a rust-loosening spray) around the pin’s edges and wait 15 to 30 minutes. This may help loosen corrosion or debris. Tap again very gently. Wipe away excess oil immediately to prevent residue buildup.
- Optional: gentle heat (last resort). Another cautious approach is to apply gentle heat with a hairdryer on low setting for 30 seconds, directing the warmth at the pin and surrounding link. Metal expands slightly with warmth, which can ease a stuck pin. Tap gently again. Do not use high heat or direct flame; this risks damaging the watch and its internal components.
If after these steps the pin remains immovable, stop and do not continue. Forcing the pin risks irreversible damage. At this point, consider whether professional help may be appropriate for this specific bracelet.
Risk Prevention: What Not to Do
- Do not force pins. Gentle, controlled taps are the standard. If a pin resists, troubleshoot rather than escalate to hard strikes.
- Do not work on carpet. Small pins can disappear into carpet fibers permanently. Work on a solid, stable table or desk with a soft cloth and a parts tray to catch anything that falls.
- Do not let pins scatter. Capture each pin immediately as it exits and place it in your parts tray. A lost pin means a broken bracelet until you source a replacement.
- Do not remove all links from one side. Removing equal links from both sides is essential for a centered, comfortable fit. Asymmetrical removal causes the clasp to sit off-center and creates an uncomfortable wear experience.
- Protect the bracelet finish. Metal bracelets scratch easily. If your tools have sharp or rough edges, consider placing a thin layer of painter’s tape on the tool contact points to cushion impacts and prevent marks. Never drag tools across the bracelet surface.
Step 3 — Remove Links (Screw-In Method)
This section walks you through shortening a metal watch bracelet that uses screw-in pins, so you do not accidentally treat them like pressure pins.
1. Confirm You Have Screw-In Pins
- Look closely at the side of the bracelet links you plan to shorten.
- Find a small, circular metal head with a straight slot across it, just like a tiny screw on each removable link.
- Check both sides of the link:
- If you see a screw head/slot on one side and a plain tube on the other, it is usually a single-screw design.
- If you see screw heads/slots on both sides of the same link, it is often a two-piece design.
- If you do not see any screw heads or slots, your bracelet likely uses another system (such as a pressure pin), and you should follow the appropriate method for that type instead.
- Stop if you are unsure what you are seeing. Forcing a screwdriver into something that is not a screw head can damage the bracelet.
2. Choose the Right Screwdriver
- Use a dedicated small watch or precision screwdriver, not a large household screwdriver.
- Select a flathead tip that fills the screw slot from edge to edge without overhanging it. A typical size for screw-in pins is around 1.4–1.6 mm flathead.
- Test-fit the tip in the screw slot:
- The blade should sit snugly with no wobble.
- If it rocks or only touches the center of the slot, choose a wider blade.
- If it will not fully seat because it is too wide, choose a slightly smaller blade.
- Avoid worn or rounded screwdriver tips, which greatly increase the risk of stripping the screw head.
- Stop if you cannot get a solid, full-depth fit in the slot. Do not “make it work” with an oversized or obviously wrong driver.
3. Prepare for Safe Screw Removal
- Place your parts tray within easy reach so you can drop each screw into it immediately after removal.
- Support the bracelet so the link you are working on is stable and does not twist while you turn the screwdriver.
- Hold the screwdriver straight in line with the screw, not at an angle, so the blade engages the slot fully.
- Apply firm downward pressure into the screw to keep the blade seated before you start turning.
- Stop if the screwdriver starts to climb out of the slot or feels like it is skating across the screw head; that is a sign of “cam-out” and an early warning of stripping.
4. Loosen and Remove Single-Screw Designs
- With the screwdriver fully seated and supported, turn the screw counterclockwise to loosen it.
- Use small, controlled turns rather than one hard twist. Think of easing the screw out, not breaking it free with force.
- If the screw feels stuck:
- Re-seat the screwdriver and increase only the downward pressure, not sideways torque.
- Try very slightly tightening clockwise first (a tiny nudge), then back counterclockwise to break any light bond.
- Stop immediately if you feel the screwdriver slipping, skipping, or the slot beginning to round. Do not keep turning; that is how screw heads get stripped.
- Once the screw is mostly loose, finish unscrewing it with gentle turns and carefully lift it out on the screwdriver tip or with your fingers.
- Place the screw directly into the parts tray before moving to the next link so it cannot roll away.
5. Loosen and Remove Two-Piece (Male/Female) Screws
- Inspect the link again to confirm there are screw heads on both sides.
- Two-piece (male/female) design means one piece (male) threads into the other (female). Choose one side as your “working” side. If possible, lightly hold the opposite screw with a second driver or keep gentle finger pressure on it to prevent it from spinning freely.
- Seat the main screwdriver firmly in the working-side screw head.
- Turn counterclockwise in small, controlled movements while keeping good downward pressure.
- If the screw on your side turns but does not seem to back out, the opposite side may be rotating with it:
- Stop and stabilize the opposite side with a second tool, if you have one.
- Then resume turning only one side.
- When the first screw comes free, place it into the parts tray before removing the second piece (if it is separate).
- Gently slide out the remaining screw part or pin body and add it to the parts tray with the first piece so the pair stays together.
- Stop if you feel heavy resistance or see any distortion in the screw slot; additional force can permanently damage the hardware.
6. Separate Links After Screw Removal
- Once the screw-in pins are fully removed from both ends of the link you planned to remove, gently pull the bracelet sections apart.
- Lift out the link or links you intended to remove, keeping track of which side of the clasp each came from according to your earlier plan.
- Place the spare removable links and any corresponding screw-in pins into the parts tray so you can find them later if you decide to lengthen the bracelet again.
- Do not twist or bend the remaining links to force them apart. If they resist separating, double-check that all screws and pin parts are completely removed.
- Stop and inspect the joint if anything catches; forcing it can bend the link shoulders or threads.
7. Reconnect the Bracelet with Screw-In Pins
- Align the shortened bracelet so the holes in the end links line up cleanly with each other.
- Insert the screw-in pin or screw segment back through the aligned holes, matching the original orientation you observed during disassembly.
- Start the screw by hand or with the screwdriver using very light turns, making sure it catches the threads smoothly without cross-threading (attempting to thread at an incorrect angle, which damages the threads).
- Turn the screw clockwise to tighten, using only modest finger force:
- Snug is enough; do not lean on the screwdriver.
- If you feel sudden resistance that does not match the earlier feel, back the screw out and try again to avoid damaged threads.
- Stop immediately if the screwdriver starts to slip in the slot while tightening. Re-seat the blade; if it keeps slipping, do not continue.
- Repeat on the opposite side of the bracelet if you removed screws there as part of the same link removal.
8. Optional Thread Lock for Extra Security
- If you are happy with the bracelet length and do not expect to adjust watch fit again soon, you may choose to use a small amount of Loctite or similar thread lock on the screw threads.
- Apply only a tiny drop to the threaded part of the screw, avoiding any spill onto the visible surfaces of the bracelet.
- Insert and tighten the screw as described above, turning clockwise until it is snug but not over-tightened.
- If you think you may need to resize watch bracelet length again in the near future, it is reasonable to skip thread lock so the screws remain easier to remove.
- Stop and wipe away any excess thread lock immediately if you see it squeeze out around the screw head.
Reassembly Checklist
- All screw heads fully seated in their slots
- No wobble or movement in reattached links
- Screws tightened snugly but not over-tightened
- Thread lock applied (if desired) and excess wiped away
- Bracelet sections aligned straight with no twists
Post-Adjustment Checklist
- Bracelet fit verified on wrist with one-finger gap achieved
- Watch does not slide or feel loose during arm movement
- Clasp sits centered and balanced
- Parts inventory complete—all removed pins and links stored safely
- Tools cleaned and dried, ready for storage
- Spare pins, links, and screws stored in labeled container for future adjustments
Safety and “Stop If…” Warnings for Screw-In Pins
- Stop if the screwdriver cam-outs (jumps out of the slot) more than once; reassess your tip size, angle, and pressure.
- Stop if the screw head shows visible rounding or burring; further attempts can strip it completely.
- Stop if turning the screw requires so much force that the bracelet is twisting or your hand is shaking; that level of torque is too high.
- Always place each removed screw and link into the parts tray right away to avoid losing these small components.
- If a screw-in pin feels badly damaged or immovable, do not escalate force; this is a good point to pause rather than risk permanent damage to the bracelet.