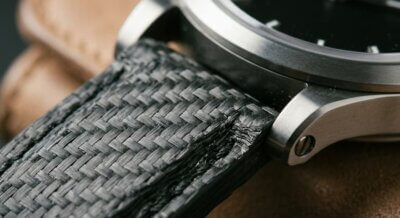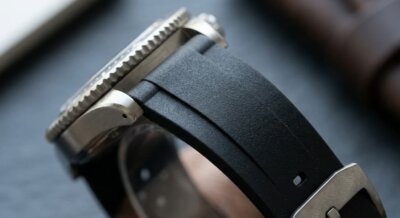
What Is a NATO Strap & How Is It Built?
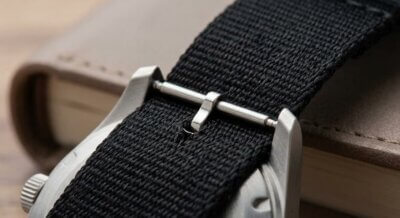
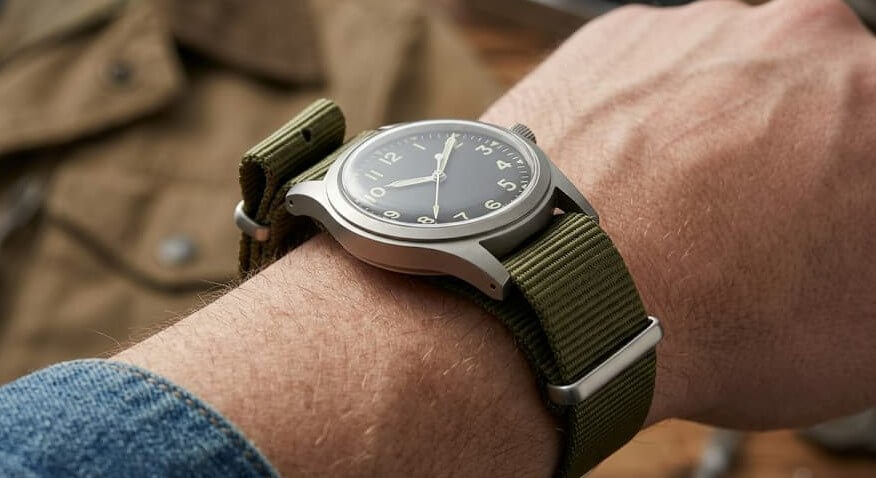
A NATO strap is a single-piece nylon strap with two layers of fabric that loops under the watch head.
Think of it as one long strip of nylon that slides between your watch and your wrist, then folds back on itself to create a secure, two-layer design under the watch.
Key Parts of a NATO Strap (NATO Anatomy 101)
Before you install anything, it helps to know what each part is called and what it does.
- Long end: The longer part of the strap that you thread through the watch and tuck back into the keepers.
- Short end: The shorter part with the buckle that usually sits on the 12 o’clock side of the watch.
- Buckle: The metal piece on the short end that you use to fasten the strap around your wrist, like a belt.
- Keeper: The loop that holds any extra strap so it does not flap around.
- Fixed keeper (near the buckle): A keeper that is sewn in place next to the buckle and does not move.
- Floating keeper (movable on long end): A keeper that slides along the long end so you can position it where it best holds the extra length.
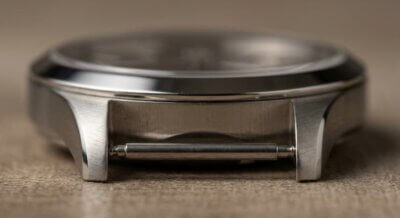
- Spring bar: A small spring-loaded bar that runs between the watch lugs and holds the strap to the watch.
- Watch lug: The small “arms” at the top and bottom of the watch case where the spring bars sit.
When you see 12 o’clock side in this guide, it means the top of the watch when it is face-up. The 6 o’clock side means the bottom of the watch when it is face-up.
How the Two-Layer Design Works
A NATO strap uses a two-layer design under the watch head. The long end first passes under the watch, then loops back through a keeper so the watch rests on two layers of nylon.
- Redundancy: Because the strap runs under both spring bars and creates two layers, the watch has a backup layer of material if one point fails.
- Comfort: The doubled nylon acts like a soft pad between your wrist and the metal watch case.
- Aesthetics: The strap sits neatly in one piece, with the keepers managing any extra length so it looks tidy on the wrist.
This layout is what makes the later installation steps feel logical: you will thread the long end through, bring it back through a keeper, and that naturally creates the two-layer design under the watch.
One Size Fits Most: How NATO Straps Handle Different Wrists
Most NATO straps are intentionally cut longer than you think you need. This extra length is not a mistake; it lets the same strap work on many wrist sizes.
- On larger wrists, more of the long end is used just to wrap around, so little excess is left to tuck.
- On smaller wrists, you will have more extra length, which is why the fixed keeper and floating keeper are so important.
- You can tuck inward or tuck outward later to manage bulk, and some wearing methods are designed specifically to slim things down for smaller wrists.
The combination of extra length and keepers is why a single NATO strap can usually fit a wide range of wrist sizes.
Diagram-Style Description: NATO Strap Laid Flat
Imagine the strap on a table, laid out in a straight line, face-up, from left to right.
- Far left: You see the short end with the buckle. Right next to the buckle is the fixed keeper (near the buckle), sewn in place.
- Just to the right: The floating keeper is sitting a little further along the strap, able to slide toward or away from the buckle.
- All the remaining length to the right: This is the long end, which will be threaded through the watch.
- The watch lugs and spring bars are not attached yet in this view; think of them as two small bars that the long end will pass under later.
If someone drew this as a diagram, they would label from left to right: buckle, fixed keeper, floating keeper, long end.
Diagram-Style Description: NATO Strap On the Watch
Now picture the watch face-up with the strap installed and centered.
- At the 12 o’clock side, the spring bar (the small metal pin inside the watch lug) holds the strap in place.
- At the 6 o’clock side, another spring bar does the same thing.
- The long end of the strap runs from the buckle area, under the 12 o’clock spring bar, under the watch head, and out past the 6 o’clock spring bar.
- From there, it loops back through the floating keeper so that, under the watch, two layers of nylon sit between the case and your wrist.
- The buckle and fixed keeper (near the buckle) usually end up on the 12 o’clock side of your wrist when fastened.
In a labeled drawing, you would see the watch head in the center, with watch lugs at 12 and 6 o’clock, spring bars sitting inside each pair of lugs, and the strap forming a smooth two-layer design underneath.
NATO Strap Anatomy & Parts
This table gives you a quick reference for each part and what it does.
| Part Name | Location | Function | Beginner Note |
|---|---|---|---|
| Long end | Extends from the keepers around your wrist | Threads through the watch and back through the keeper to create the two-layer design | This is the part you pull and tuck after the watch is on |
| Short end | Opposite end of the strap, attached to the buckle | Holds the buckle in place on the 12 o’clock side of the watch | Stays mostly in one place while the long end does the threading |
| Buckle | On the short end, near the fixed keeper | Fastens the strap to your wrist, like a belt buckle | Use this to adjust how tight or loose the strap feels |
| Keeper (fixed) | Next to the buckle, sewn in place | Helps secure the extra strap after you fasten the buckle | Does not move; you always thread excess strap through it |
| Keeper (floating) | Further along the strap, slides on the long end | Fine-tunes how the extra strap is held down for a neat look | You can slide this closer or farther to control bulk |
| Spring bar | Between each pair of watch lugs at 12 and 6 o’clock | Holds the strap to the watch case at both ends | Small, spring-loaded bar; handle gently to avoid scratching the case |
NATO vs. Traditional Two-Piece Strap (Quick Comparison)
To understand why a NATO strap feels different to handle, it helps to compare it to a traditional two-piece strap.
- Traditional two-piece strap: Two separate pieces, one attached at the 12 o’clock side and one at the 6 o’clock side. The watch head sits directly on your wrist between them.
- NATO strap: One continuous piece that passes under the watch head, connecting both spring bars and creating a two-layer design between the case and your skin.
This single-piece layout is a big reason many people find a NATO strap easier to swap and more forgiving for beginners.
Confidence Callout: Easier to Work With Than It Looks
Even if the parts list sounds new, a nylon NATO is simpler to handle than a metal bracelet or many traditional straps because it is flexible, lightweight, and one piece instead of two.
You can technically install it without tools, but using a basic spring bar tool makes handling the spring bars safer for your watch and reduces the chance of accidental scratches on the case.
Next, you will gather your tools and set up a scratch-safe workspace so you can install your NATO strap with confidence.
Why NATO Straps Thread Through Two Spring Bars (The Logic Behind the Design)
A NATO strap’s defining feature is that it threads through both spring bars on your watch—the pin at the 12 o’clock side and the pin at the 6 o’clock side. This single-piece path creates a dual-layer hold that keeps your watch secure even if one attachment point loosens or fails. Understanding this design principle helps you see why the threading process matters and why it works so reliably for everyday wear and active use.
Every watch case has two spring bars, one near the top and one near the bottom of the case. These small metal pins sit inside the watch lugs, which are the small notches on either side of the watch case where straps attach. A traditional two-piece strap has two separate end pieces, each anchored to one spring bar independently. If one side fails, the watch can slip off your wrist. A NATO strap, by contrast, is one continuous piece of nylon fabric that loops under the entire case and threads through both spring bars. This creates a redundant path: even if one attachment point loosens, the other side and the underside loop keep the watch in place.
Think of it like a seatbelt with two anchor points instead of one. A seatbelt is more effective at holding you safely because it has multiple connection points. Similarly, a NATO’s two-point threading design is especially popular for active wear, sports, and situations where you need extra assurance that your watch will not fall.
Here is how a NATO compares to a traditional two-piece strap at a glance:
| Feature | NATO Strap | Traditional Two-Piece Strap |
|---|---|---|
| Installation Path | Single piece threads through both spring bars (12 and 6 o’clock) | Two separate pieces, each attaches to one spring bar |
| Security | Dual-layer hold; watch supported from underneath as well | Single attachment point on each side; no underneath support |
| Redundancy | If one spring bar loosens, the other and the underside loop keep watch secure | If one spring bar fails, that entire side may release |
| Ease of Installation | Moderate; requires threading through two points and looping back | Simple; slide each end piece onto its spring bar |
This two-bar threading is not a complication—it is the reason NATO straps are trusted by divers, military personnel, and anyone who needs a watch that will not slip off under stress. Once you understand this logic, the installation steps that follow will make complete sense. Next, you will gather the tools and set up a scratch-safe workspace to begin the installation.
What You’ll Need Before Installing Your NATO Strap
Before you begin threading your NATO strap, gathering the right tools and preparing your workspace will make the process smooth, safe, and scratch-free. This section walks you through everything you need and how to set up properly.
Essential Items
Start by collecting these items:
- Your watch with the old strap removed
- Your new NATO strap
- A clean, flat work surface (kitchen or dining table)
- A soft towel or cloth to protect your watch case
The Spring Bar Tool – Recommended, Not Mandatory
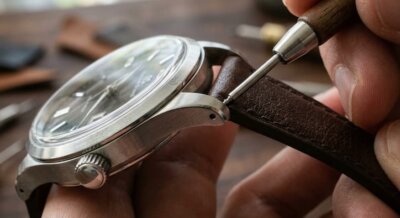
A spring bar tool is a small, flat metal implement designed to compress the spring bars (the metal pins that hold watch straps in place). You will use it to remove your old strap and, in some cases, to help install your new NATO strap.
Do I Really Need a Spring Bar Tool? Technically, you can use a small flathead screwdriver as a substitute. However, a dedicated spring bar tool is strongly recommended for beginners. Here’s why: it is designed with the right angle and width to avoid scratching or damaging your watch case, which is a common mistake when using improvised tools. A spring bar tool costs around $5 to $10, is reusable for a lifetime of watch strap changes, and is available online, at watch retailers, or at hardware stores. The small investment pays for itself after just one or two strap changes.
Optional Items for Extra Comfort
If you wear glasses or have difficulty seeing small details, a magnifying glass or jeweler’s loupe can help. A second soft cloth is also useful for wiping your hands during the process.
Preparation Steps
Follow these four steps to prepare your workspace and watch:
- Remove the old strap from your watch using the spring bar tool. Set the old strap and any removed spring bars aside in a safe place.
- Re-install the two spring bars into the watch lugs (the small notches on the sides of your watch case where straps attach). The spring bars should click into place and sit flush between the case and the lug openings. This is a critical step that many beginners skip—do not proceed without confirming the spring bars are secure.
- Lay a clean, soft towel flat on a table, desk, or kitchen counter. This towel serves two purposes: it protects your watch case from scratches if it shifts during installation, and it prevents any tiny parts (like spring bars) from rolling away and getting lost.
- Place your watch face-up on the towel. The watch dial should face upward, and the case should rest comfortably in the center of the towel. This positioning gives you clear access to both the 12 o’clock and 6 o’clock spring bars where you will thread the NATO strap.
Before You Start Checklist
Run through this quick checklist to confirm you are ready:
- Spring bar tool (yes/no)
- Old strap removed (yes/no)
- Spring bars re-installed (yes/no)
- Clean work surface (yes/no)
- Watch positioned face-up (yes/no)
If you answered yes to all five items, you are ready to move forward to the installation steps. If you answered no to any item, pause and complete that task now. Rushing through preparation is the most common reason beginners encounter problems during installation.
A Final Mindset Note
NATO strap installation is simple and forgiving, but it requires patience. Do not force the strap or the spring bars. If something feels stuck or stiff, stop, rotate the watch slightly, and try again gently. Your watch is tougher than you think, but the point of this guide is to help you avoid unnecessary scratches and frustration. Take your time, and you will have your NATO strap installed correctly in five to ten minutes.
How to Install a NATO Strap – The Standard Method (Version 1)
Version 1 is the traditional and most popular way to wear a nylon NATO strap. It involves threading the long end through both spring bars, then looping it back through the floating keeper to create a secure two-layer stack around your wrist. This method works well for most wrist sizes and provides excellent security for active wear.
Step-by-Step Installation
Follow these seven steps in order. Take your time with each one, and refer to the photo-ready descriptions to ensure you are positioning your hands and watch correctly.
- Position your watch face-up on a clean, padded surface (such as a towel). Hold the long end of the NATO strap in your dominant hand. The buckle and fixed keeper should be pointing away from you. Identify the 12 o’clock position on the watch—this is the side closest to the watch crown (the dial-side top). You are about to insert the strap at this location.
- Insert the long end of the strap downward through the gap between the spring bar and the watch case at the 12 o’clock side. Push the strap all the way through until it emerges on the back side of the watch. You should feel the strap sliding smoothly between the metal spring bar and the watch case itself. The strap is now passing underneath the watch head.
- Rotate or reposition the watch slightly so you can access the 6 o’clock side (the opposite end, near the watch case back). From the underside of the watch, pull the same long end upward and through the second spring bar at the 6 o’clock position. The strap now passes through both spring bars, sandwiching the watch head securely between two anchor points.Pro tip: If the strap feels stiff or difficult to thread through the second spring bar, rotate the watch 90 degrees (so the 12 and 6 o’clock positions face left and right instead of up and down). This changes the angle and often makes the second threading easier.
- Slide the watch head up or down along the strap (while still on the table) until the strap fabric extending on both the left and right sides of the watch case is equal. When centered correctly, you will see strap fabric visible and even on both sides of the watch lugs at the 12 and 6 o’clock positions. The watch should not appear too high (bunched up toward the 12 o’clock keeper) or too low (bunched toward the 6 o’clock keeper). Adjust by gently pulling the watch upward or downward along the strap until equal fabric is visible on both sides.
- Pull the long end of the strap back through the floating keeper (the movable loop on the long end of the strap). This creates the characteristic two-layer stack: the strap now wraps around the watch head and folds back on itself, with the long end secured in the keeper. The watch is now ready to wear.
- Place the watch on your wrist with the watch head sitting on top of your forearm and the keepers positioned on the underside. Thread the long end of the strap through the fixed keeper (the loop permanently attached near the buckle). Then insert the long end through the buckle opening and pull it back toward your wrist. Adjust the tightness until the watch sits comfortably—snug enough that it does not slide, but loose enough that you can fit one finger underneath the strap.
- Tuck any excess strap tail either inward (underneath the strap layers, against your skin) or outward (away from your skin, visible on the outside). Choose whichever feels more comfortable during the day. Excess tucked inward keeps the tail hidden and reduces bulk; excess tucked outward keeps the tail accessible if you need to adjust the fit during wear. Both options are valid—select based on your preference and comfort.
Key Checkpoints: What Should Feel Tight vs. Snug
As you install the strap, verify these tactile sensations to confirm you are on the right track:
- The strap should feel tight where it passes between the spring bar and the watch case. This is correct and necessary—the spring bars grip the strap securely in this gap.
- The strap should feel snug (not tight) around your wrist when fastened. You should be able to slide one finger easily under the strap, but not two or three. If it feels too loose, the watch will slide; if it feels too tight, circulation may be restricted.
- Do not force the strap through the spring bars. If it resists, pause and try rotating the watch 90 degrees or gently working the strap back and forth rather than pulling hard. Forcing risks scratching your watch case.
Visual Check: Watch Head Centered
After Step 4, your watch should look like this: the dial faces upward (toward your eyes when wearing it), and the strap fabric extends equally on both sides of the case—not bunched on one end. If the watch appears too high on the strap, pull it downward. If it appears too low, pull it upward. The goal is a balanced, centered appearance.
Example: Threading at 12 O’Clock
Hold your watch face-up. The 12 o’clock side is the top of the dial. Pick up the long end of the strap with your thumb and forefinger, keeping the strap flat and unwrinkled. Insert it downward into the gap between the spring bar and the case—imagine sliding a thin card into an envelope. Push it all the way through until it comes out the back side. You have now completed the first threading.
Example: Pulling Through at 6 O’Clock from the Back
After threading at 12 o’clock, the long end is now on the back (underside) of the watch. Reach underneath the watch case with your fingers and locate the 6 o’clock spring bar—it is directly opposite the 12 o’clock side. Pull the long end upward through the gap between this spring bar and the case. The strap now anchors the watch from both the top and bottom.
Example: Centering the Watch Head
Before centering: The watch case is pushed too high toward the 12 o’clock keeper, leaving a large loose section of strap below it toward the 6 o’clock side.
After centering: The watch case is repositioned so strap fabric is visible and even on both sides. The watch sits in the middle of the two keepers.
To adjust, pinch the strap on one side and slide the watch case gently upward or downward along the fabric until balance is restored.
Example: Tucking Excess Inward vs. Outward
Tuck inward: The excess strap tail is folded underneath the strap layers and rests against your skin on the inside of your wrist. The tail is hidden from view, and the watch profile appears clean and minimal.
Tuck outward: The excess strap tail is left on the outside of the strap, visible on the back of your wrist or forearm. The tail is easy to access if you need to loosen or tighten the fit during the day, and some wearers find this more convenient.
NATO Installation Checklist
Before you move on to wearing your watch, verify each of these points:
- Long end threaded through the 12 o’clock spring bar: Yes / No
- Long end pulled through to the 6 o’clock spring bar from the back: Yes / No
- Watch head centered between the two keepers: Yes / No
- Long end looped back through the floating keeper: Yes / No
- Excess strap tucked (inward or outward): Yes / No
If all five items are checked, your NATO strap is installed correctly and ready to wear. If any item is not confirmed, review that step before proceeding.
Alternative Wearing Methods – When to Use Version 2 & Version 3
The standard Version 1 method works for most people, but your wrist size, style preference, and how you like the watch to sit can all influence which wearing method feels best. NATO straps offer flexibility: you can thread from the top, thread from the bottom, or use a slimmer single-loop approach. This section walks you through Version 2 and Version 3, and helps you pick the one that matches your needs.
Version 2: The Backward Method
Version 2 reverses the starting point. Instead of threading the long end through the 12 o’clock side first, you start at the 6 o’clock side. The steps are nearly identical to Version 1, but the buckle ends up positioned differently on your wrist, which some people find more comfortable or aesthetically pleasing.
The concept: thread the long end through the 6 o’clock spring bar from the back, pull it up and through the 12 o’clock spring bar, center your watch head between the keepers, loop the long end back through the floating keeper, and fasten on your wrist. The result is the same secure two-layer design, just approached from the opposite end.
When to use Version 2: if the buckle placement from Version 1 feels awkward on your wrist, or if you prefer the visual arrangement of the strap on the back of your watch to be reversed. Some people also find this method easier if their watch lugs feel tight on one side.
Version 3: The Single-Loop Method (Slimmer Profile)
Version 3 is the minimalist approach. You thread the long end through both spring bars exactly as in Version 1, but you skip the step of looping the long end back through the floating keeper before you put the watch on. Instead, you fasten the watch on your wrist first, then thread and tuck the excess on-wrist. This creates a slimmer profile because there is less bulk behind the watch head.
Key difference: The watch sits lower and closer to your wrist, and the excess strap tails are secured only after you are wearing it. This method reduces the two-layer effect and makes the NATO sit more like a traditional single-pass strap.
Step-by-step for Version 3:
- Thread the long end of the NATO through the 12 o’clock spring bar from the back of the watch.
- Pull the long end underneath and up through the 6 o’clock spring bar.
- Center your watch head between the keepers.
- Do not loop the long end back through the floating keeper yet. Instead, put the watch on your wrist immediately.
- Once the watch is on your wrist, take the long end and pass it through the floating keeper of the short end.
- Fasten the buckle and adjust for comfort.
- Tuck any excess tail inward or outward as preferred.
When to use Version 3: if you have a small wrist and the two-layer bulk of Version 1 feels too thick, if you wear your watch under shirt cuffs and want a slimmer profile, or if you simply prefer less material bunching behind the watch head. This method is also popular for dress watches where a refined, minimal look is desired.
Wearing Methods Comparison
This table summarizes the three methods side by side to help you compare at a glance.
| Method | Official Name | Best For | Bulk Level | Difficulty |
|---|---|---|---|---|
| Version 1 | Traditional (12 o’clock start) | Standard and larger wrists; maximum security and two-layer redundancy | Higher | Beginner-friendly |
| Version 2 | Backward Method (6 o’clock start) | Preference for reversed buckle placement; alternative comfort option | Higher | Beginner-friendly |
| Version 3 | Single-Loop (slimmer method) | Small wrists; under-cuff wear; minimal bulk preference | Lower | Intermediate |
Choosing Your Method: A Simple Decision Guide
Use this guide to narrow down which version suits you best:
- Small wrist (under 7 inches): Version 3 is your best choice. The slimmer profile prevents excess strap material and keeps the watch sitting comfortably without bulk.
- Standard to large wrist (7 to 8 inches or larger): Version 1 (traditional) is the default. It provides maximum security and the two-layer design sits naturally without discomfort.
- Dress watch or under-cuff wear: Version 3 provides a slimmer profile that sits neatly under shirt cuffs and gives a more refined appearance on the wrist.
- Any wrist size, comfort or aesthetic preference: Try Version 2 if you prefer the buckle on the other side or if the strap arrangement feels better reversed. There is no wrong choice; it is entirely about what feels right to you.
Important Reminder: There Is No Right or Wrong
All three methods secure your watch equally well. The differences are comfort, bulk preference, and visual style. If you install using Version 1 and it feels bulky, switch to Version 3 next time. If you prefer the buckle placement of Version 2, use it every day. NATO straps are designed to be flexible, so experiment and pick your favorite. Many watch enthusiasts rotate between methods depending on the situation (dress watch under a cuff, sports watch with casual wear, formal event, etc.).
Nylon vs. Ring NATO – Understanding the Variants
When you start shopping for NATO straps, you will quickly notice that not all NATOs are built the same way. The standard nylon NATO is by far the most common design you will encounter, and it is what this guide focuses on. However, understanding the differences between standard NATO and ring NATO will help you make an informed choice and avoid confusion when browsing options.
Standard NATO vs. Ring NATO: The Key Difference
A standard NATO strap uses a keeper system—small fabric loops that hold the excess strap in place after you have wrapped it around your wrist. These keepers are either fixed (attached near the buckle) or floating (movable along the long end). When you thread a standard NATO through your watch’s spring bars and wrap it around your wrist, you loop the excess back through these keepers to secure it neatly. A ring NATO, also called a 3-ring NATO, replaces the traditional keeper loops with small metal rings or fabric loops positioned at set points along the strap, giving it a more structured appearance with less flexibility for adjustment.
To quickly identify which type you are looking at, lay the NATO flat on a table. A standard NATO will show a continuous long piece of fabric with small rectangular or oval loops sewn near the buckle and somewhere along the length. A ring NATO will display small metal rings or reinforced fabric loops at specific intervals along the strap.
| Type | Design | Keeper System? | Best For |
|---|---|---|---|
| Standard NATO | Two-piece nylon with fabric keepers (fixed and floating) | Yes – traditional floating keeper loop | Beginners, most wrist sizes, everyday wear, easiest adjustment |
| Ring NATO (3-ring) | Two-piece nylon with metal or reinforced rings instead of keepers | No – uses fixed rings at set points | Minimalist style, lighter feel, wearers who prefer a sleeker look |
Installation Differences
The core threading method is nearly identical for both types: you thread the long end through the 12 o’clock spring bar, under the watch, and back through the 6 o’clock spring bar. The difference appears in the final step. With a standard NATO, you loop the excess long end back through the floating keeper to secure it. With a ring NATO, you thread the excess through one of the metal rings instead. The principle is the same—preventing excess strap from flapping—but the hardware is different.
Because ring NATO rings are fixed in place, you have less flexibility to adjust where the excess sits. This makes ring NATOs less forgiving if you are between sizes or prefer to fine-tune the fit frequently. Standard NATOs, with their movable floating keeper, allow you to slide the keeper up or down the long end to find your comfort zone.
Material Reminder: Nylon Is Standard
Both standard and ring NATOs come primarily in nylon—affordable, durable, and easy to clean with soap and water. Nylon is your default expectation for either variant. Leather NATO straps exist and are beautiful, but they require a different installation method entirely and are handled separately in this guide. When you are buying your first NATO, assume nylon unless the listing explicitly says leather. Buying your first NATO? Go with a standard nylon NATO. It is the most common design, the easiest to adjust, and the most beginner-friendly.
Leather NATO – Why It’s Different & When You’ll Encounter It
Leather NATO straps are a real option, but they do not behave like a nylon NATO and should not be installed using the same threading method.
With a nylon NATO, the material is thin, flexible, and designed to slide between the spring bars and the watch case without damage.
Leather is thicker and more delicate, so dragging it back and forth against the case and spring bars can quickly scratch and scuff the leather surface and edges.
This is why you should never try to force a leather NATO through the tight gap between the spring bars and the watch case the way you would with nylon.
Instead, leather NATO straps are installed more like a traditional leather strap: the spring bars are removed, the leather is positioned directly inside the watch lugs, and then the spring bars are re-installed to hold it in place.
This method is more time-consuming than threading a nylon NATO, and it requires more careful tool use around the leather and the watch case.
Most beginners will first encounter a leather NATO when they upgrade to a premium strap option that offers a dressier look or a softer feel on the wrist.
Because of the extra care and different installation method involved, it is usually best to start with a nylon NATO for your first strap and move to leather once you are comfortable handling spring bars and basic strap changes.
Is Your NATO Leather or Nylon?
Before you decide how to install your strap, take a moment to confirm whether your NATO strap is nylon or leather.
A nylon NATO usually looks like a smooth, matte, densely woven fabric, often with visible weave texture and a slightly flexible, cloth-like feel.
A leather NATO will look and feel like leather: the surface can be matte or glossy, with natural grain, possible stitching near the edges, and a more structured, less floppy body than nylon.
If you are unsure which material you have, check the product description from the retailer or ask the seller directly so you can follow the correct installation method.
Nylon vs. Leather NATO Installation
The table below gives a high-level comparison of how nylon and leather NATO straps are installed and what beginners should keep in mind.
| Material | Installation Method | Spring Bar Removal? | Risk | Tool Requirement |
|---|---|---|---|---|
| Nylon NATO | Thread the long end between the watch case and both spring bars, then loop back through the keeper and fasten. | No, as long as there is enough clearance between case and spring bars. | Low risk to the strap; main concern is avoiding scratches on the watch if you rush. | Spring bar tool strongly recommended for removing the old strap and checking bar security, but not required for the threading itself. |
| Leather NATO | Remove spring bars, place the leather strap directly inside the watch lugs, then re-install the spring bars to secure it. | Yes, the spring bars must be removed and re-installed; do not pull leather through the gap. | Higher risk of scratching and creasing the leather if you try to force it through tight clearances instead of removing the bars. | Spring bar tool needed to safely remove and re-seat the spring bars without slipping and marking the leather or case. |
If you are installing a leather NATO, [see our dedicated leather NATO installation guide]. We focus on nylon here.
Whichever material you choose, avoid forcing the strap through any tight gap; with leather in particular, the need to remove and re-install the spring bars is a built-in safety step to protect both the strap and the watch.
Common Mistakes & Troubleshooting – Get Unstuck
Even with clear instructions, first-time NATO strap installations often hit a few snags. The good news: every mistake below is fixable in seconds, and most are completely normal. You will likely redo the steps once or twice before it clicks—and that is okay. Here are the seven most common errors beginners encounter, plus exactly how to fix them.
The Seven Most Common Mistakes & Quick Fixes
Mistake 1: Threading the Short End First. The short end (the buckle side) should never go through the spring bars first. If you have threaded it at the 12 o’clock position, undo it immediately and reverse the order. Always start with the long end. Remove the short end, thread the long end at 12 o’clock, pull it through to 6 o’clock from behind the watch, and then proceed with the keeper loop.
Mistake 2: Forgetting to Loop the Long End Back Through the Keeper (Version 1). If you skip this step, your watch will feel wobbly and unstable on your wrist, even if it is technically installed. The floating keeper—the movable loop on the long end—is essential for keeping the watch centered and secure. Before you put the watch on your wrist, pull the long end back through that keeper. You should feel it lock into place and stabilize the watch head.
Mistake 3: Watch Head Sits Too High or Too Low. After threading both spring bars, your watch should sit centered between the two keepers. If it is creeping toward the 12 o’clock side (too high) or the 6 o’clock side (too low), simply slide the watch case up or down along the strap until it is balanced in the middle. Centered is correct. A watch positioned too high will feel unstable; too low will bunch the strap awkwardly against your wrist.
Mistake 4: Strap Won’t Thread Smoothly or Feels Stuck. If you are forcing the strap through and it feels tight or resistant, stop and try this: rotate your watch 90 degrees so the lugs face sideways instead of straight up. This changes the angle and often makes threading effortless. Alternatively, if tightness persists, check that the spring bars are fully seated in the watch lugs before attempting to thread the strap. A spring bar that is not fully compressed or in place can make the gap narrower and cause resistance. Verify both spring bars click into place and sit flush. If the strap is still tight, use a spring bar tool to gently lever the strap through—this is exactly what the tool is designed for. Never force the strap by hand; gentle pressure and patience prevent scratches and damage to your watch case.
Mistake 5: Excess Strap Too Long or Bunches Around Your Wrist. After fastening the buckle, you will have extra strap hanging off. You have two choices: tuck it inward (fold it back under and toward the watch case for a neater, slimmer profile) or tuck it outward (fold it away from your skin, which some prefer for airflow). If excess is still excessive, consider switching to Version 3 (the single-loop method), which reduces bulk significantly for smaller wrists or those who prefer a sleeker look.
Mistake 6: Keeper Falls Off During Wear. The floating keeper was not fully threaded or slipped loose. Take off the watch, pull the long end completely out of the keeper, and re-thread it, making sure the strap is fully inside the keeper loop. You should feel slight resistance when you pull the end through—that is the keeper gripping the strap. If it falls off again, the keeper itself may be worn; consider replacing the strap.
Mistake 7: Watch Feels Loose on Your Wrist. Even if the NATO is installed correctly, a loose fit is usually a buckle problem. When you fasten the strap around your wrist, make sure the buckle is fully engaged—pull the long end snug and hold it firmly in place as you secure it through the buckle opening. The strap should be snug but not cutting off circulation. If it still feels loose, you may have chosen a strap size that is too large for your wrist; consult the manufacturer’s size guide.
Watch Head Positioning: Too High vs. Too Low vs. Centered
The position of your watch case on the strap is critical to both stability and comfort. Here is what to look for.
| Position | What You’ll See & Feel | Is It Correct? | How to Fix |
|---|---|---|---|
| Too High (watch creeping toward 12 o’clock) | The watch head sits closer to the buckle end. The strap below the watch bunches. Watch feels tippy or unstable. Strap wrinkles under the case. | No | Slide the watch case downward along the strap until it is balanced between the fixed keeper and floating keeper. The case should be equidistant from both ends. |
| Too Low (watch creeping toward 6 o’clock) | The watch head sits closer to the long end. Excess strap bunches above the watch. Watch tilts or rotates on your wrist. Keeper may feel slack. | No | Slide the watch case upward along the strap. Center it so the distance from the 12 o’clock keeper to the watch is equal to the distance from the watch to the 6 o’clock keeper. |
| Centered (balanced between keepers) | The watch head sits midway between the fixed keeper and floating keeper. Watch feels stable and snug. Strap lies flat on your wrist. No bunching or gaps. | Yes | Maintain this position. Wear and enjoy. If it drifts, re-center before the next wear. |
Use your eyes and your fingers to check: place your thumbs above and below the watch case and measure the distance visually. Equal spacing is the goal.
Are You Stuck? Run Through This Checklist
Before you give up, verify each of these points:
- Long end threaded at 12 o’clock? (Yes / No) — If No: Redo this step first.
- Long end pulled through to 6 o’clock from behind the watch? (Yes / No) — If No: Thread it now.
- Watch head centered between keepers? (Yes / No) — If No: Slide it into the middle.
- Long end looped back through the floating keeper? (Yes / No) — If No: Do this before wearing.
- Strap tight around your wrist when fastened? (Yes / No) — If No: Pull the long end tighter through the buckle.
If all five are yes, your NATO is installed correctly and ready to wear.
What NOT to Do: Common Damage Risks
Here are the actions that risk scratching or damaging your watch—avoid them at all costs. Do not thread the short end (buckle side) first through the spring bars; this defeats the purpose of a NATO strap and can confuse the install. Do not forget the keeper loop step; a NATO without the keeper engaged is unstable and unsafe. Do not force the strap through tight lugs; instead, use a spring bar tool or rotate the watch 90 degrees for a better angle. Do not pinch or squeeze the watch case between your fingers while threading; rest the watch on a soft towel and use gentle leverage instead. Do not overtighten the strap around your wrist; it should be snug but not restricting blood flow.
Reassurance: It’s Completely Normal to Redo This
If you have pulled the strap out and started over once, twice, or three times, you are in excellent company. The NATO strap is intuitive once you have done it, but the first install often requires a practice run or two. Most beginners get it right on the second or third attempt. Each time you redo it, you are building muscle memory and confidence. By your fourth NATO strap, you will thread it without thinking.
Care & Maintenance
A nylon NATO strap is durable and low-maintenance, but it will perform better and last longer with simple, consistent care. Sweat, moisture, and salt accumulation can cause odor, discoloration, and material breakdown over time. The good news: maintaining your NATO strap takes just a few minutes and requires only items you already have at home.
Cleaning Your NATO Strap
Clean your NATO strap monthly or whenever you notice visible dirt, sweat buildup, or odor. Follow these steps:
- Rinse the strap under warm running water to loosen surface dirt and debris.
- Apply a small amount of mild dish soap or hand soap directly to the nylon.
- Gently scrub both sides of the strap with your fingers or a soft brush, paying attention to seams and the underside where sweat accumulates.
- Rinse thoroughly under warm water until all soap is gone.
- Squeeze out excess water with your hands; do not wring or twist the strap.
- Air dry completely in a cool, dry place before wearing again. Never use a hair dryer, radiator, or direct sunlight, as heat can damage the nylon and adhesives.
Storage & Rotation
Store your NATO strap in a clean, dry environment away from direct sunlight and humidity. Rotate between multiple straps if you have them; this practice reduces constant moisture exposure and allows each strap to dry fully between wears. Even rotating every week or two extends strap life significantly and prevents mildew in damp climates.
Avoid salt water immersion, chlorine pools, and prolonged soaking. If your NATO strap is exposed to salt water during water sports, rinse it immediately with fresh water and allow it to air dry completely.
What to Expect Over Time
A new nylon NATO strap may feel stiff when you first install it. This is normal. With wear and gentle care, the nylon will soften and conform to your wrist, becoming more comfortable over weeks of use. You may also notice slight fading in color as the strap ages; this is cosmetic and does not affect function. Consistent cleaning and proper drying help preserve color and prevent mold or mildew, especially in humid environments.
Maintenance Schedule
- Rotate between straps (weekly or bi-weekly) to allow drying time and reduce constant wear.
- Clean with soap and water (monthly) by rinsing and gently scrubbing with mild soap; air dry fully.
- Air dry completely (after every wear) in a cool, dry space before storage.
- Store in dry place (always) away from humidity, direct sunlight, and heat sources.
- Avoid salt water immersion (always) and rinse immediately with fresh water if exposed to salt water or chlorine.
With these simple habits, your NATO strap will stay fresh, comfortable, and reliable for years to come.
FAQ
Q: Why does a NATO strap have two layers?
A: The two-layer design provides redundancy and security. The long end of the strap threads through both spring bars and loops back over itself, so if one attachment point fails, the other keeps your watch secure on your wrist. This is especially valuable during active wear or sports.
Q: What is the difference between the long end and short end?
A: The long end is the extended strap tail that threads through the spring bars and wraps around your wrist for fastening. The short end is the buckle side that stays near the 12 o’clock position of the watch. The long end does the securing work; the short end anchors the strap to the watch head.
Q: Do I need a spring bar tool to install a NATO?
A: A spring bar tool is strongly recommended but not technically required. It makes installation safer and prevents scratches on your watch case. If you do not have one, a small flathead screwdriver can work in a pinch, though it carries a higher risk of slipping and damaging the finish. Spring bar tools cost around five to ten dollars and are worth the investment for any watch owner.
Q: Can I install a NATO without removing my old strap first?
A: No, you must remove your old strap first. The spring bars that hold the old strap also secure the NATO, so the old strap needs to come off completely. Once removed, confirm the spring bars are reinstalled in the watch lugs before threading the NATO through them.
Q: Why does the long end thread through both spring bars?
A: Threading through both spring bars creates a continuous loop that distributes the weight of your watch across two attachment points. This dual-anchor design prevents the watch from falling if one spring bar were to loosen or fail, making NATO straps especially reliable for active use and sports.
Q: What is the difference between Version 1, 2, and 3 wearing methods?
A: Version 1 (traditional) threads the long end through the 12 o’clock spring bar first, then pulls it down through the 6 o’clock side—this is the most common method. Version 2 (backward method) reverses the starting point, beginning at 6 o’clock instead. Version 3 (single-loop/slimmer method) skips the pre-wear looping step, creating less bulk on your wrist. Choose Version 1 for standard wrists, Version 3 if you have a smaller wrist or prefer minimal layering, and Version 2 based on personal comfort preference.
Q: Should I tuck the excess inside or outside?
A: Both options are correct—it is a personal preference. Tucking inward (toward your wrist) keeps the excess hidden and creates a cleaner look. Tucking outward is easier to access and adjust on the fly. Try both and choose whichever feels more comfortable and looks better on your wrist.
Q: Can I use a NATO on any watch?
A: Yes, if your watch has two spring bars and standard lugs (the small notches on the watch case where straps attach). If your watch has an integrated bracelet or unusual attachment system, consult your watch manual or manufacturer before purchasing a NATO strap.
Q: How often should I clean my NATO strap?
A: Rinse your NATO strap monthly with mild soap and warm water, then air dry it completely. More frequent cleaning is recommended if you wear it during active workouts, swimming, or outdoor activities. Allow it to dry fully before wrapping it around your wrist to prevent mildew and odor.
Q: What is the difference between nylon and leather NATO installation?
A: Nylon NATO straps are threaded through the spring bars while they remain installed on the watch. Leather NATO straps require you to remove the spring bars from the watch, install them into the ends of the leather strap first, and then reseat the assembly into the watch lugs. This extra step protects delicate leather from being scratched by the watch case. If you are working with a leather NATO, consult the manufacturer’s instructions for your specific strap.
Q: How do I know if my NATO is fitted correctly?
A: Your watch head should sit centered between the two keepers, not too high or too low on the strap. When fastened on your wrist, the buckle should sit snugly without cutting off circulation, and you should be able to fit one finger comfortably between the strap and your skin. The watch should not slide side to side or rotate around your wrist.
Q: Can I shorten a NATO strap?
A: Yes, but it requires care. Trim only from the long end after the buckle; do not cut into the keeper or shorten the short end. Use sharp scissors and seal the cut edge with fabric glue or a lighter to prevent fraying. Test fit first by wearing the watch for a few days with the excess tucked before making permanent cuts.
Why NATO Straps Are So Popular
NATO straps have become a favorite choice for watch enthusiasts and casual wearers alike, and for good reason. Understanding what makes them so appealing can help you feel confident in your choice and get the most out of your new strap.
The Core Benefits
NATO straps offer a winning combination of practical advantages:
- Versatility: A single NATO strap can fit almost any watch with standard lugs, and the three wearing methods allow you to adjust fit for different wrist sizes and comfort preferences. This flexibility means one strap works across multiple watches and adapts to your body.
- Durability: Nylon NATO straps are built to withstand daily wear, moisture, and active use. They do not crack or fade easily, making them ideal for sports, travel, or work environments where leather would struggle.
- Affordability: Quality NATO straps cost far less than leather or metal bracelets, typically between six and twenty dollars. This makes it easy to own multiple straps and change your watch’s style without breaking the bank.
- Security: Unlike traditional two-piece straps that rely on two spring bars alone, NATO straps thread through both spring bars and wrap around the watch case. If one spring bar fails, the strap keeps your watch secure on your wrist.
- One-Size-Fits-Most Design: Because NATO straps adjust at the buckle and can be worn using different methods, a single strap accommodates small, average, and large wrists. This adaptability removes the guesswork of strap sizing.
NATO vs. Traditional Two-Piece Straps: Why Beginners Often Choose NATO
NATO straps win on three fronts for beginners: they are simpler to install once you understand the method, they cost far less than leather or metal alternatives, and they provide genuine redundancy if a spring bar loosens. If you are worried about losing an expensive strap or want something forgiving for your first installation, NATO is the logical choice.
Next Steps and Final Confidence Check
You now have everything you need to install your NATO strap successfully. Here is how to move forward with confidence:
- Pick your wearing method based on your wrist size and comfort preference. If you are unsure, start with Version 1 (traditional method); it works for most people.
- Gather your tools and set up a clean, flat workspace with a soft towel to protect your watch during installation.
- Follow the numbered installation steps slowly, checking that the watch head is centered between the keepers before you finish.
- Tuck the excess strap inward or outward based on your preference and what feels comfortable against your skin.
- If something feels stuck or misaligned, refer back to the troubleshooting section and run through the checklist—most issues have simple fixes.
- Enjoy the security, style, and versatility of your NATO strap. The installation becomes second nature after one or two tries, and you will be swapping straps like a pro in no time.
NATO straps represent one of the smartest, most beginner-friendly upgrades you can make to any watch. With patience and the method that suits your wrist, you are about to unlock a whole new level of customization and confidence in your timepiece.